LearnDash by Justin Ferriman
Biggest marketplace advantage: This plugin has more features than its competitors mentioned in this article. It is also built by a person who has a background in the e-learning space, which explains why it is so feature-rich and suitable for a wide variety of educational needs.
This plugin also integrates the most seamlessly with any theme because it mostly uses Custom Post Types to display content.
It also has an extensive list of integrations it offers, all of which are free. These range from e-commerce to membership plugins, badge features and other developer tools such as those that help with Tin-Can API reporting.
Summary: Though it launched later than WP Courseware and Sensei, this plugin seems to have advanced its list of features and functionality. I was amazed when I first saw how much it could do. However, with more functionality comes the very difficult task of designing the user interface and learnability of a software, which is where this plugin’s weak point lies (but Justin told me, they’re working on it).

LearnDash Features:
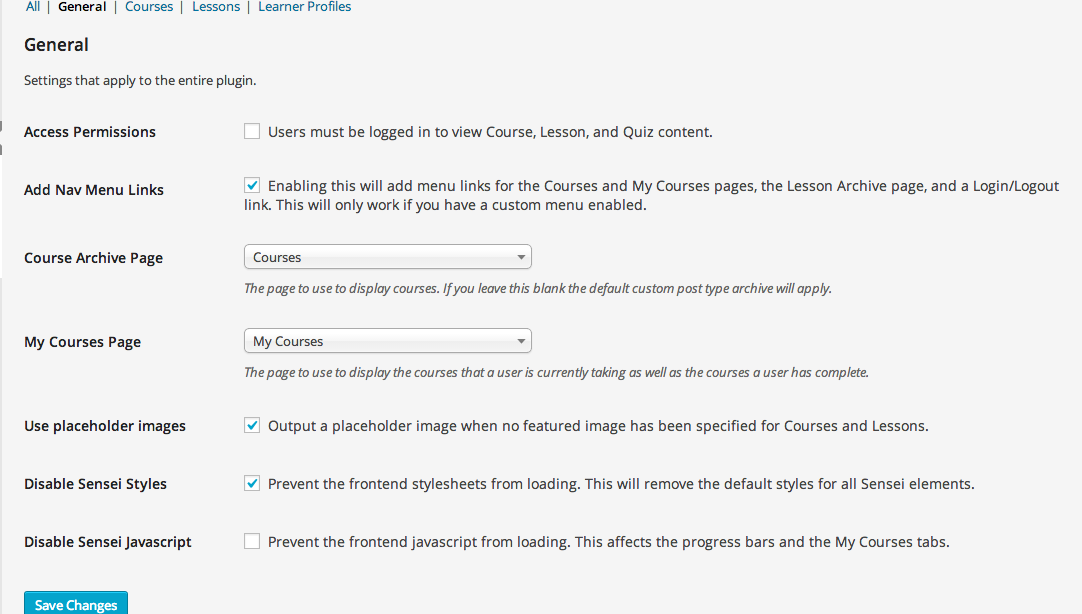
Structure, Controls and Interface:
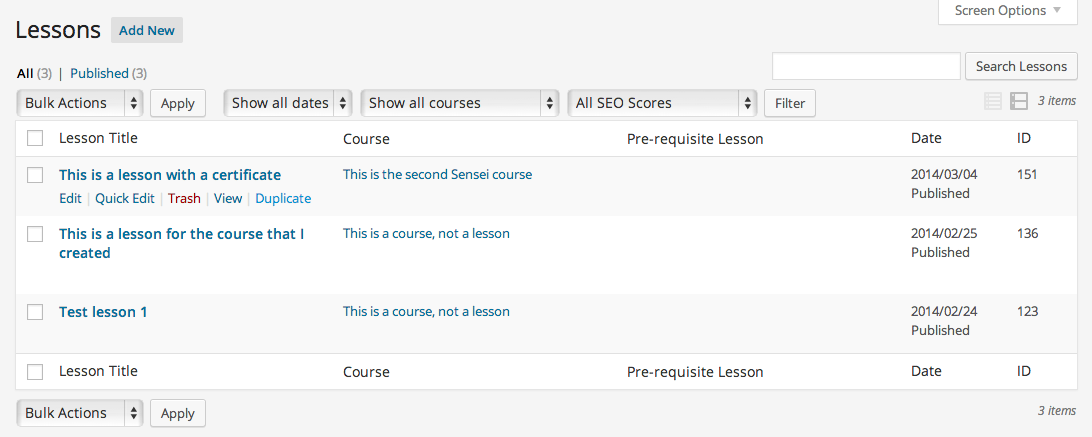
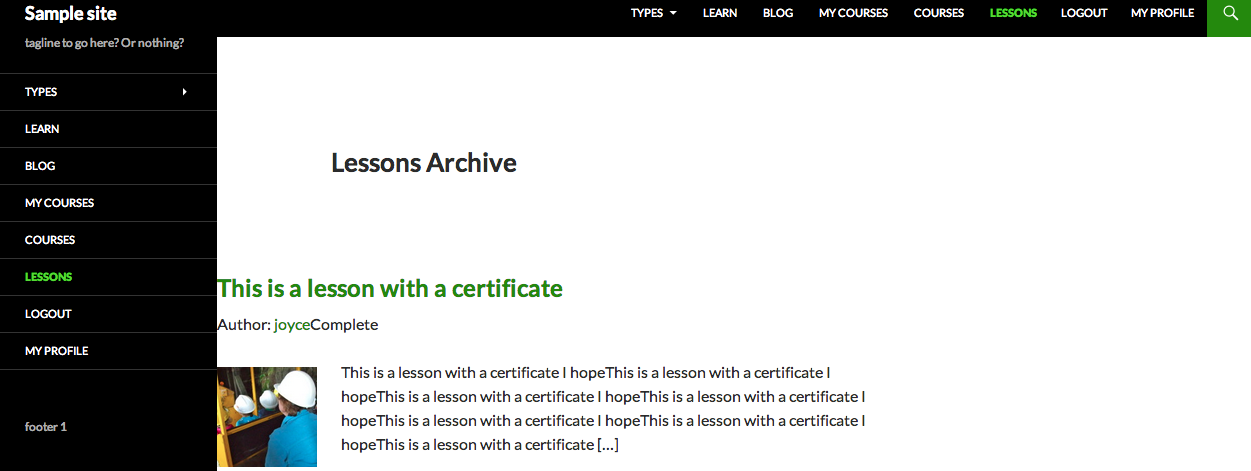
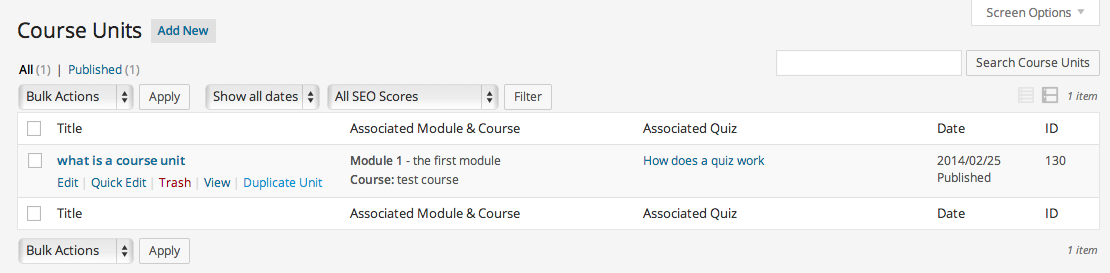
In LearnDash you have 4 separate Custom Post Types: Courses, Lessons, Quizzes and Certificates.
In addition to the above, you also have an “Advanced Quiz” area, which is separated from its plugin counterparts and shown at the bottom of the WordPress dashboard.
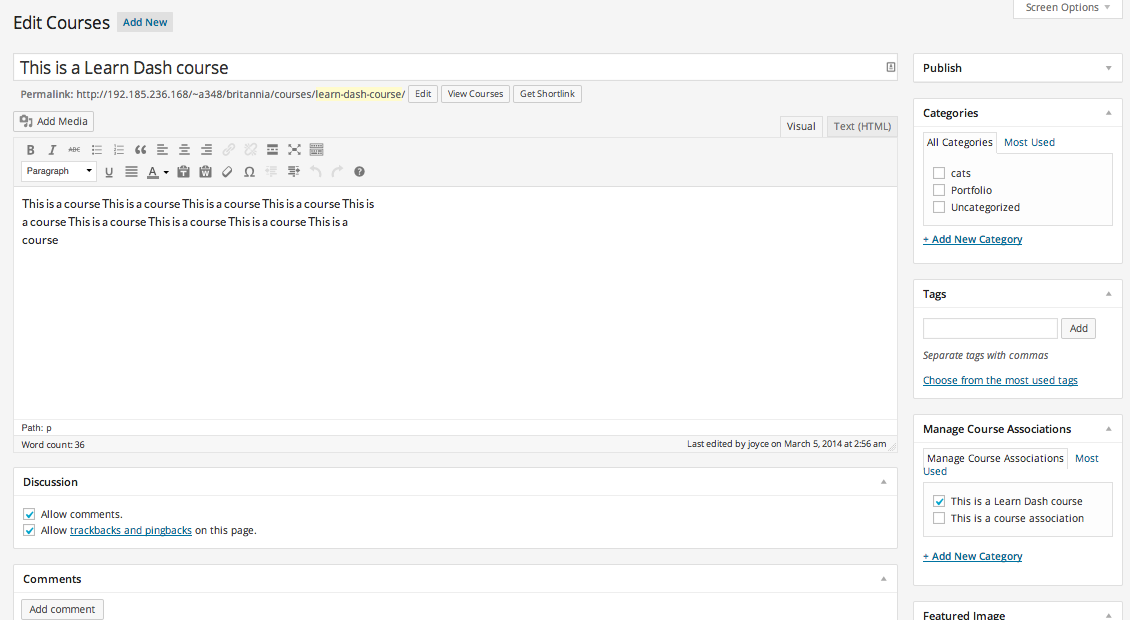
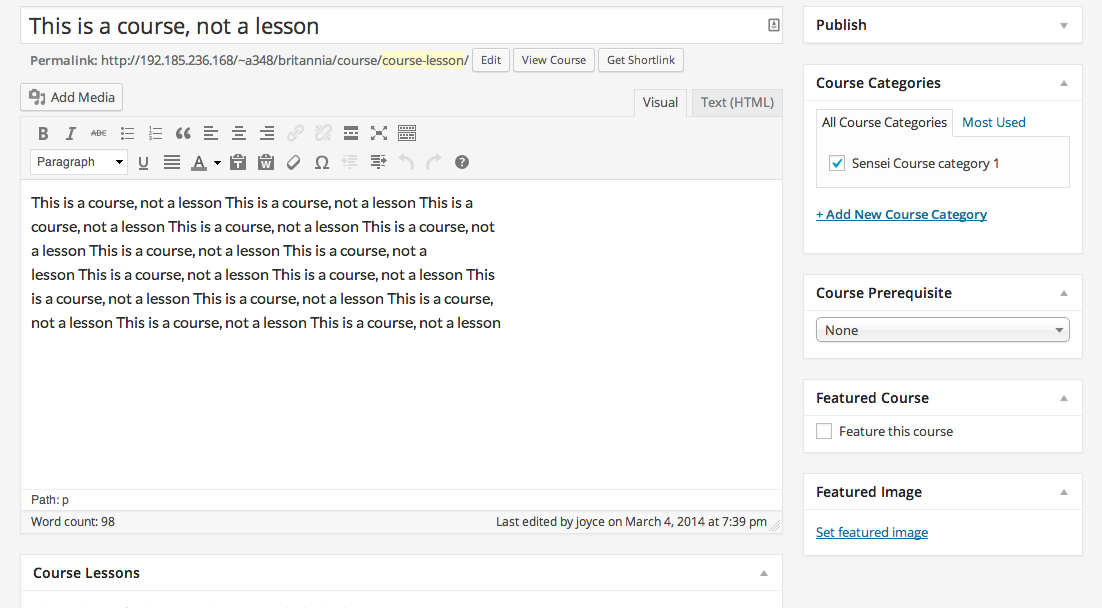
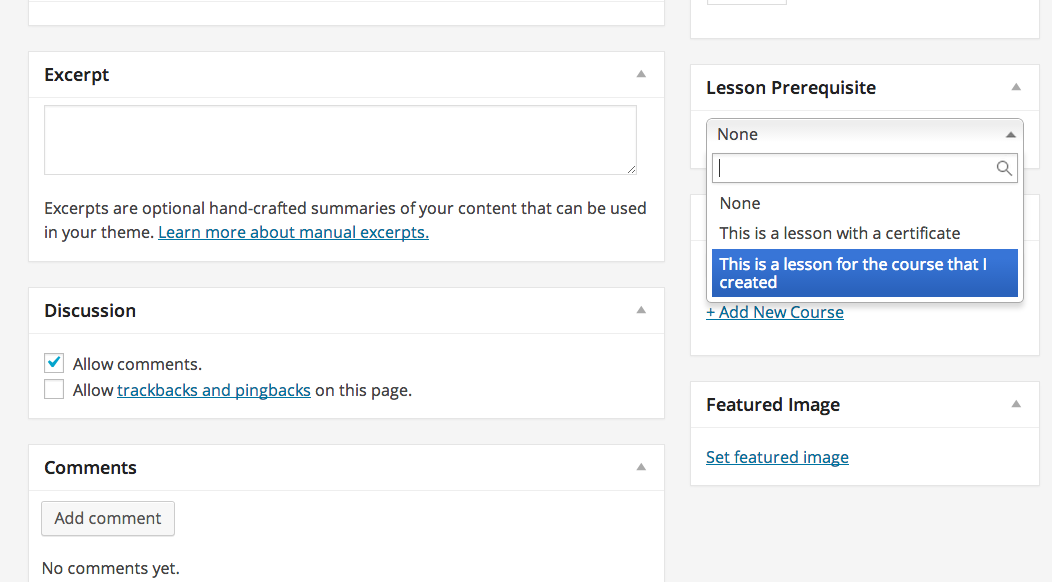
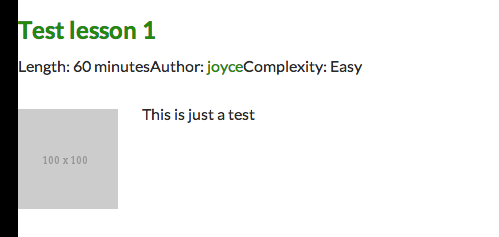
Since the plugin uses Custom Post Types, the editing area for entering Course and Lesson content looks exactly like the regular WordPress editing screen, with almost all the same controls, including Featured Image.
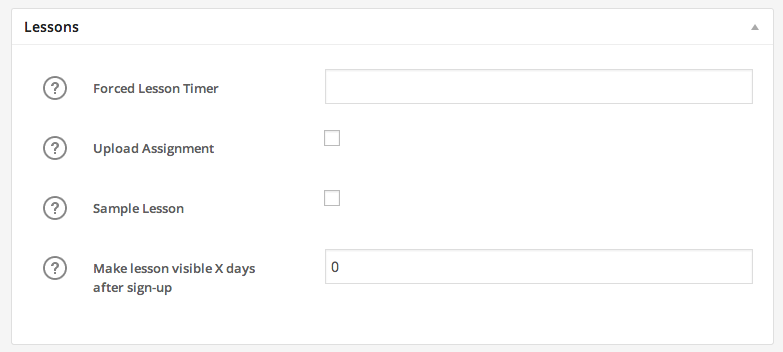
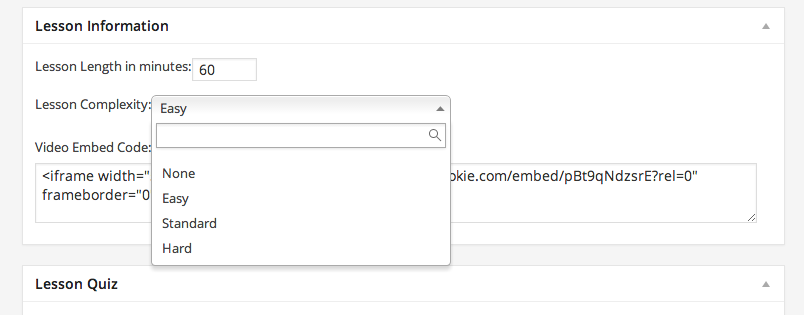
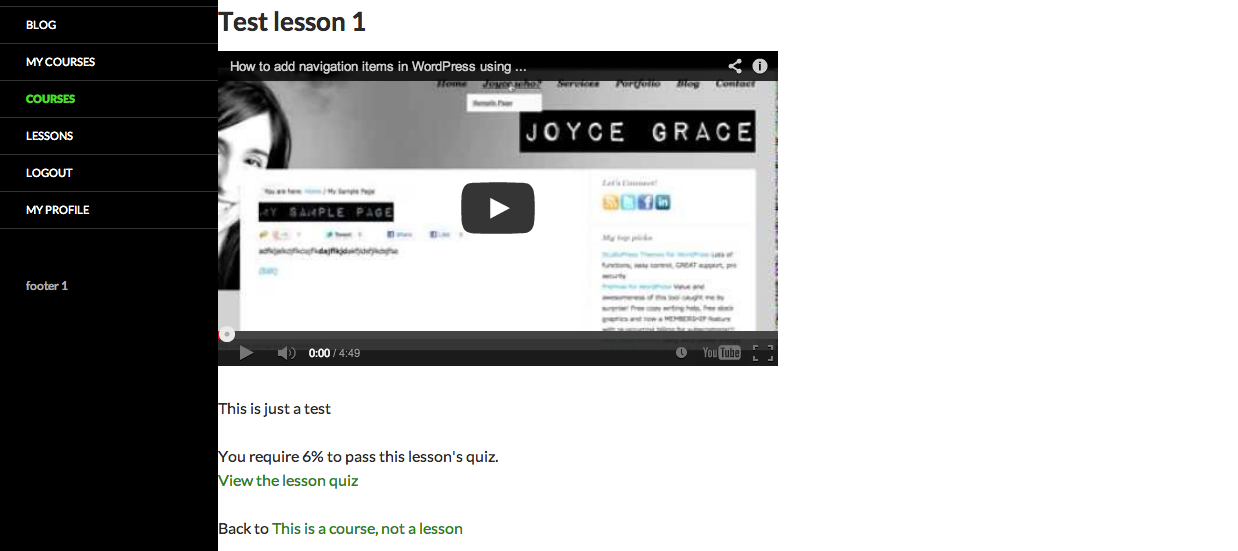
Lessons can have timers, or the option to be visible a certain number of days after a user signs up. They can also accept assignment uploads.
This plugin allows a Lesson to be set as a “sample” so people can try a few before committing to buy the entire Course.
Lessons can be forced to be taken in a certain order, or be taken randomly.
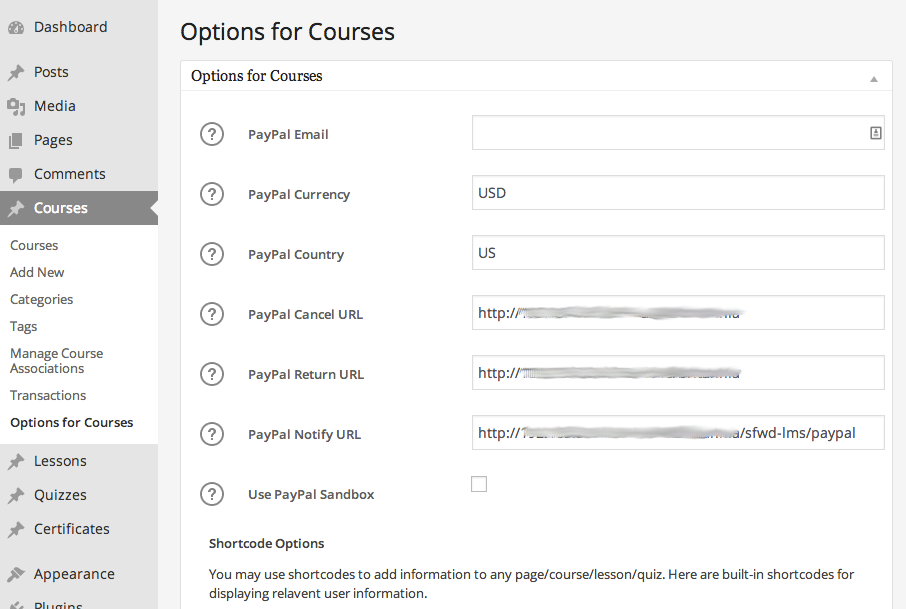
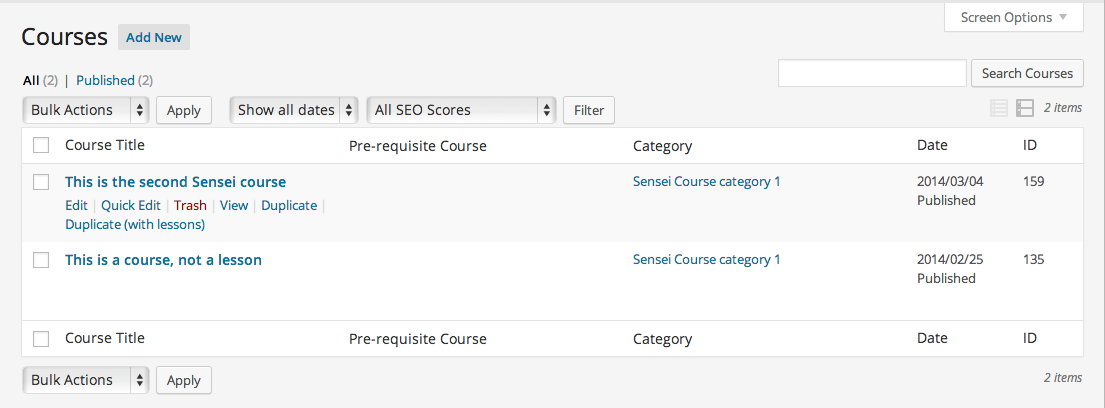
Courses can have prerequisites, can be free or paid and can be based on recurring or one-time payments. (Paypal integration is automatically set up with this plugin to allow for payment options with Courses).
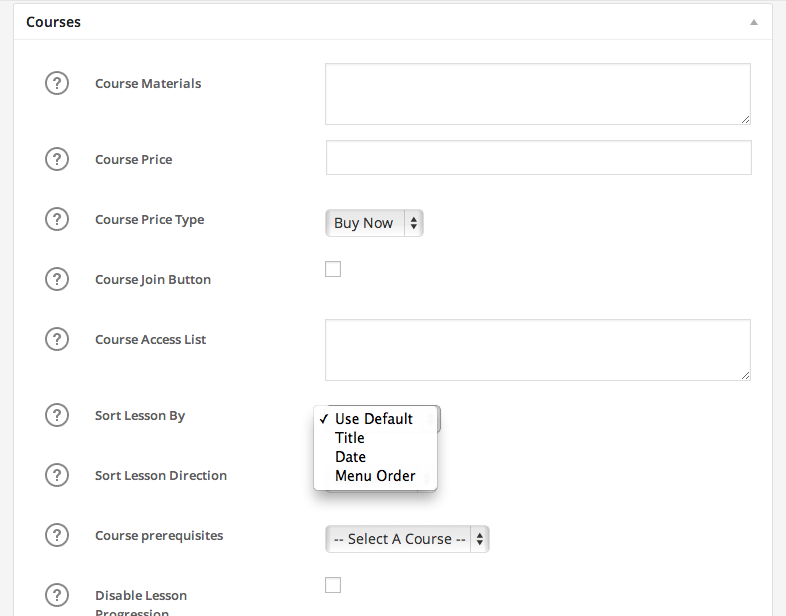
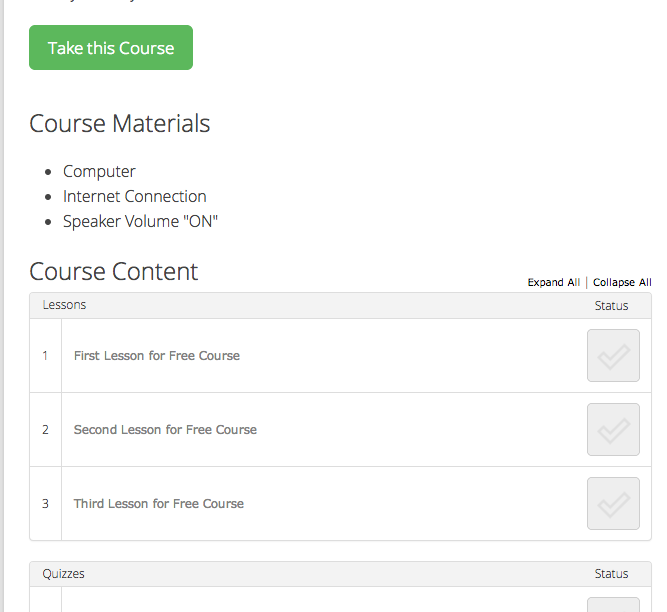
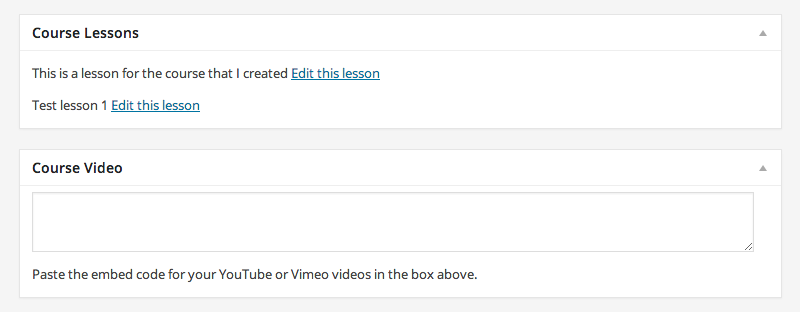
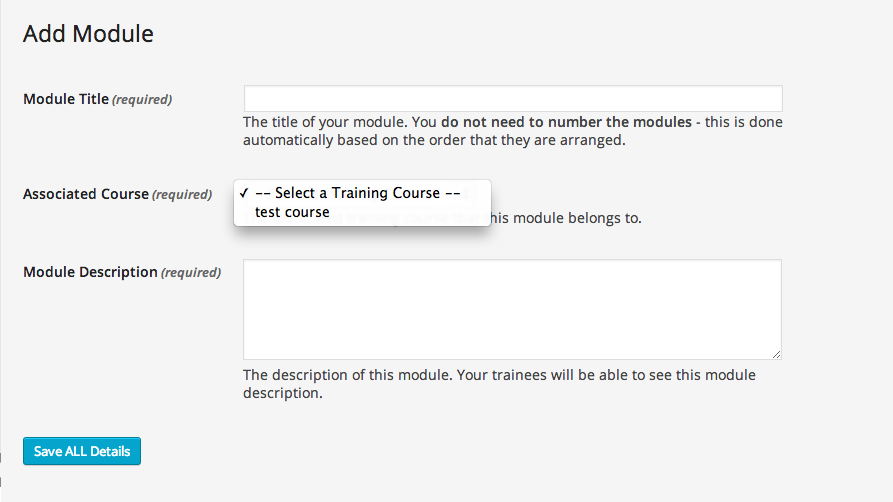
Courses have a “Course Materials” field to enter items that users will need to take the course (such as pre-purchased books, computer or software requirements, and so on).
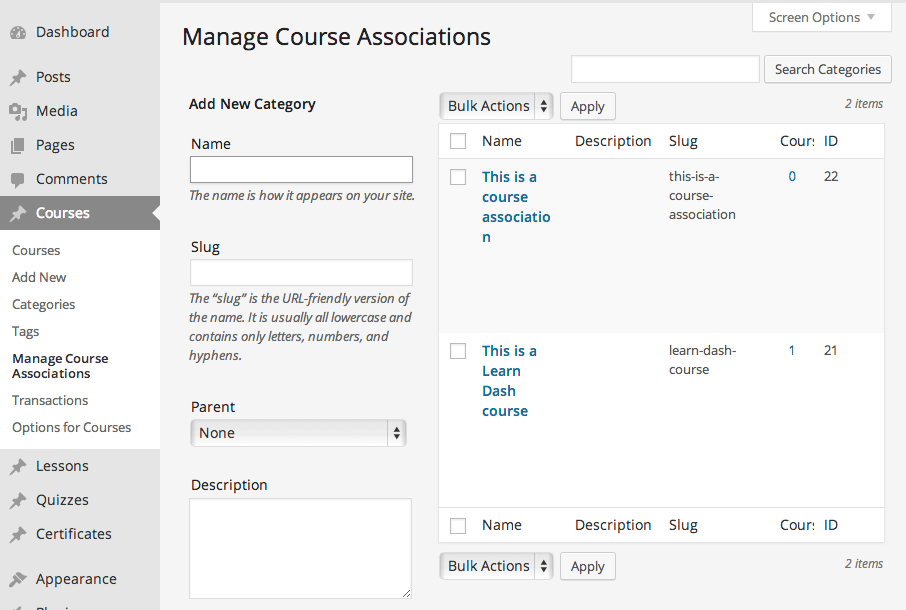
Courses and Lessons can have “Associations,” or regular categories and tags for organization. This is very confusing at first because Course titles automatically become Course Associations and the purpose of the additional Associations taxonomy is not that clear. However, as Justin, the creator explained to me, using Associations will make sure a Lesson is part of a particular Course (or more than one Course), and likewise with Quizzes. The categories and tags are for helping you organize the display of the Course listings on the front end of your website, much like using Post categories and tags.
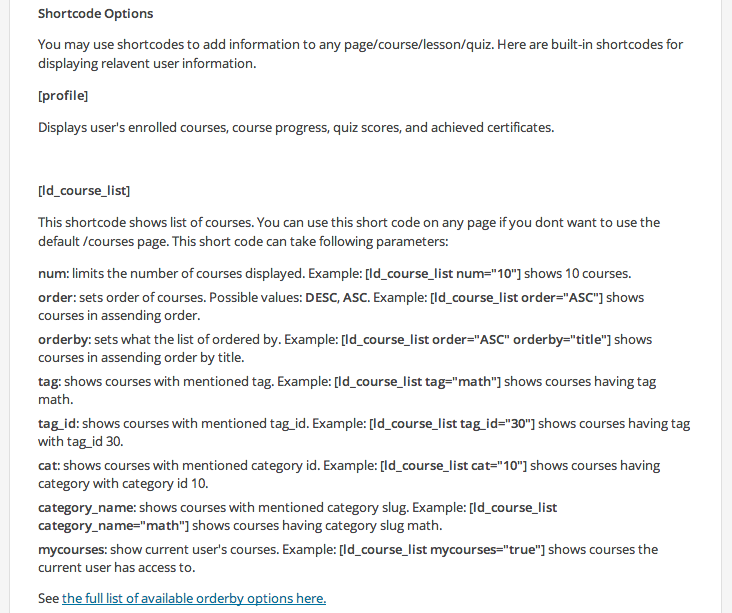
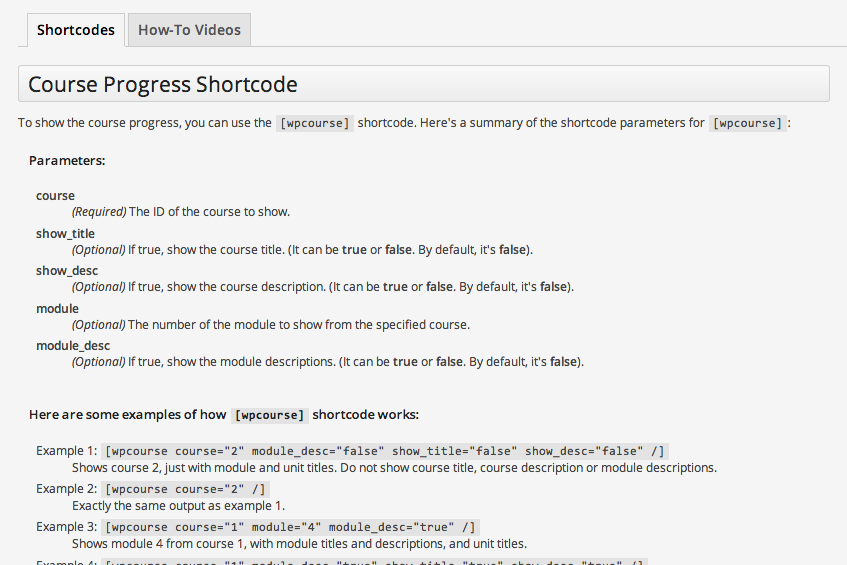
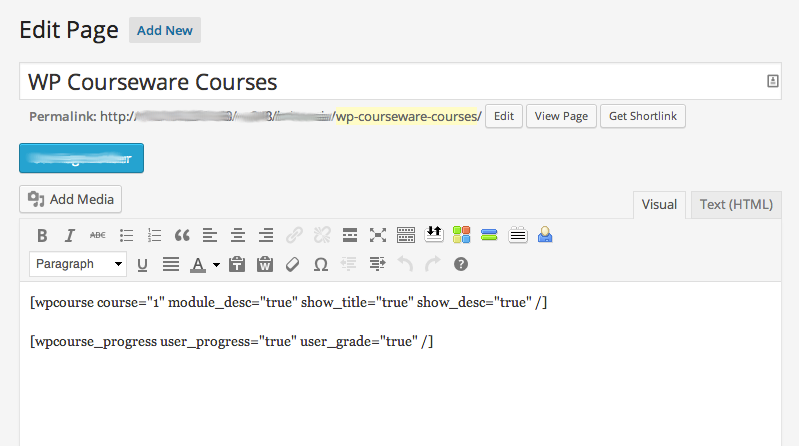
Shortcodes can be used to display Course categories or tags. Shortcodes can also be used to show a list of quizzes, payment buttons, groups, or ‘visitor’ content for those not yet enrolled in the course, plus more.
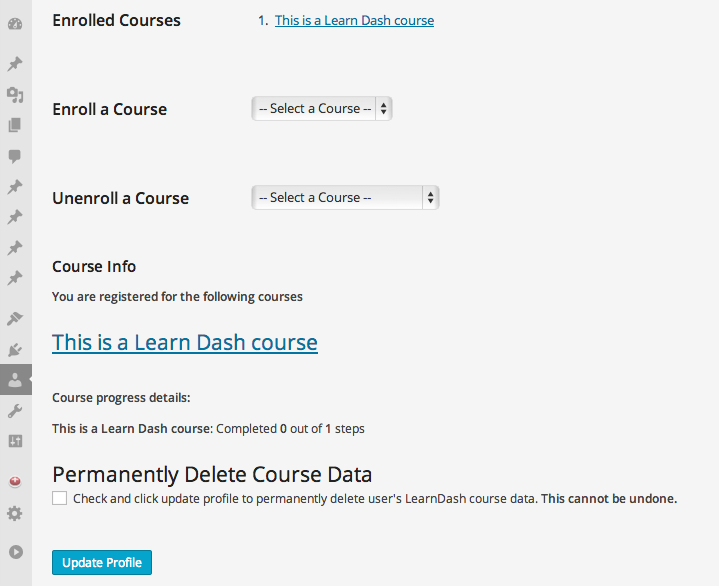
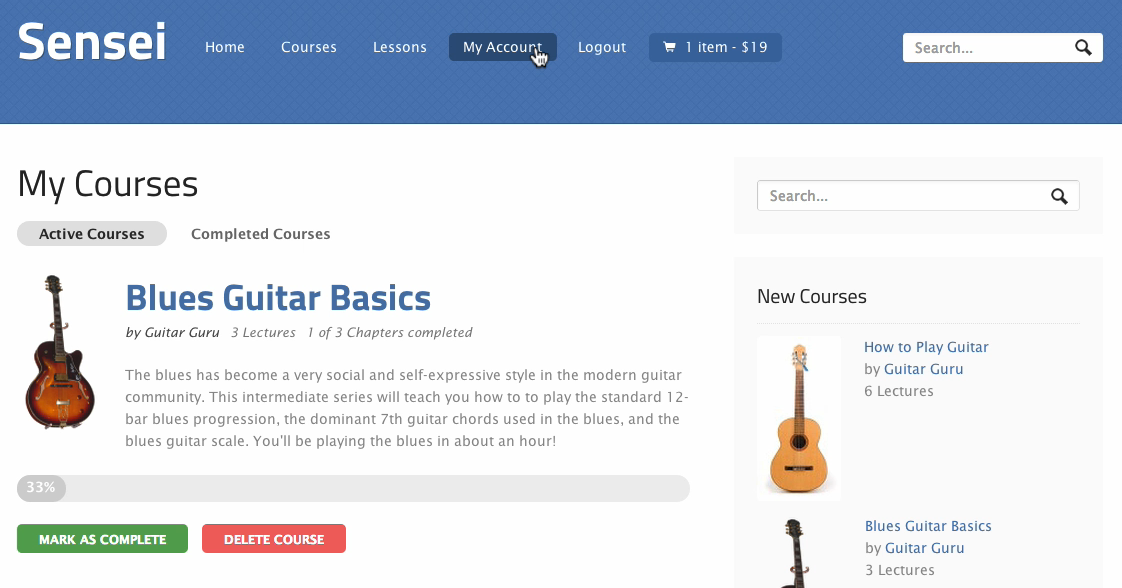
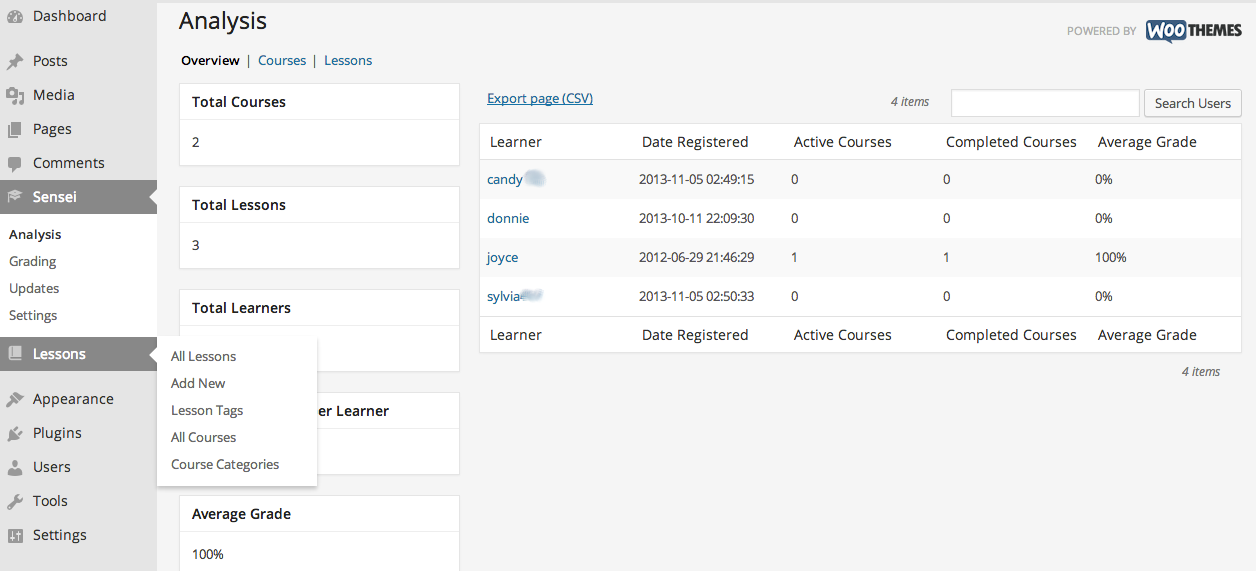
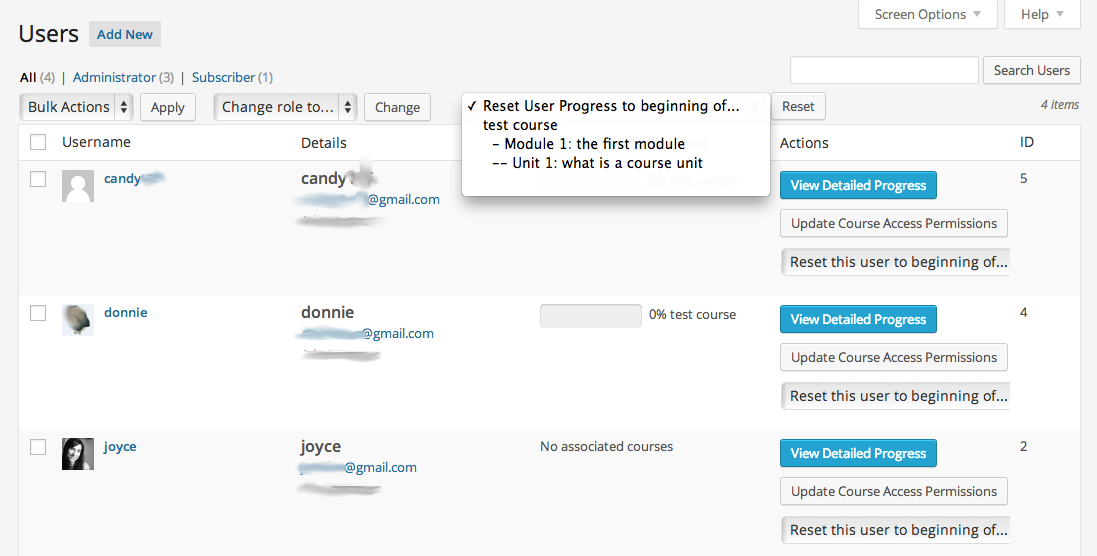
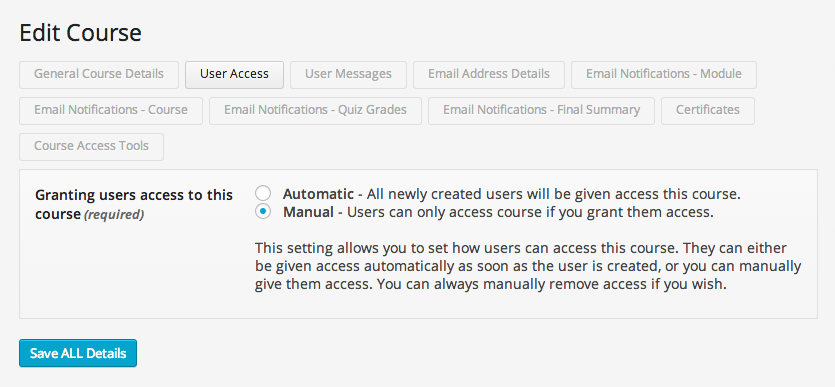
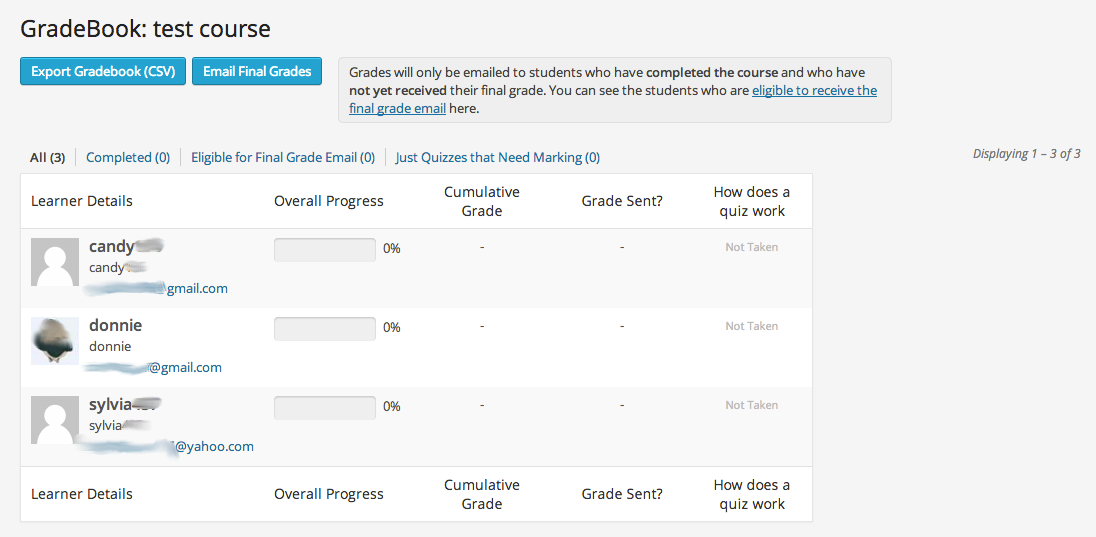
Users can be manually added or removed from a course using the regular WordPress Users menu, since all students are basically ‘Subscribers’ with LearnDash. They can also be part of a “Group,” for which there is a custom user role called Group Leader. This user role allows a teacher to review the scores and progress of students in their Group.
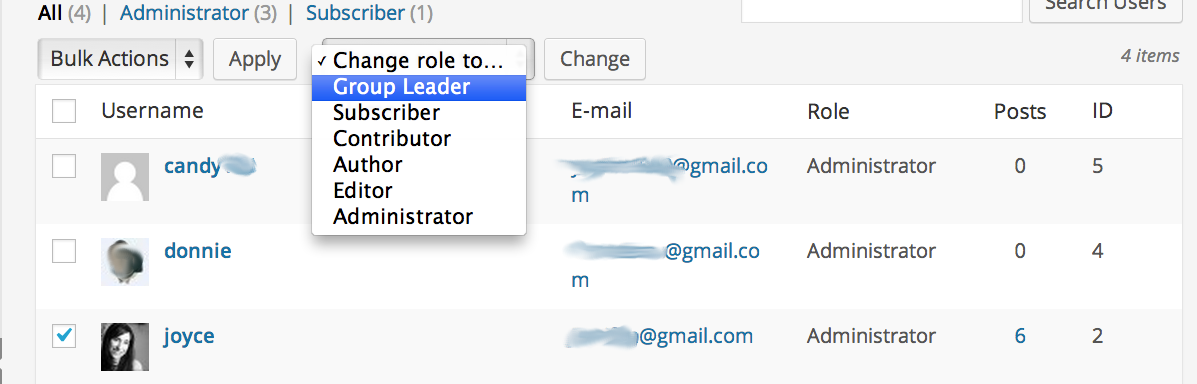
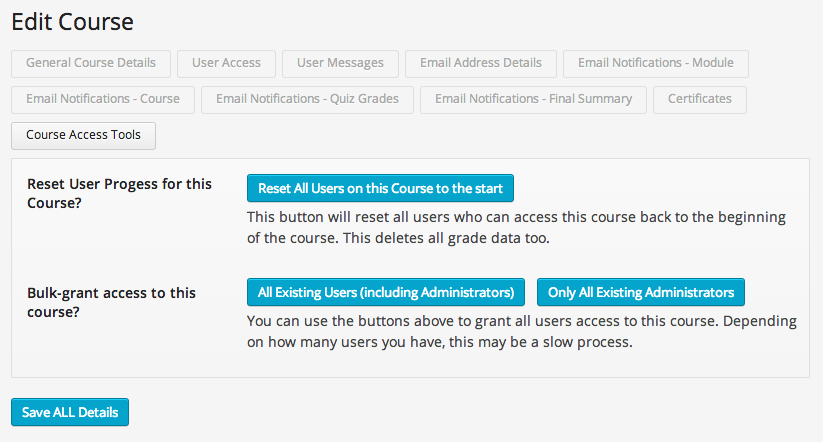
You can bulk add or remove users to a Course.
Quizzes and marking:
There are two types of Quizzes in LearnDash: the ‘simple’ Quiz, or the Advanced Quiz. Both are separate menu items. Learning the difference between the two, or the reason why two of them exist is very confusing.
The Advanced Quiz has a lot of functionality and settings options. However it is very difficult to intuitively figure out how to create and use an Advanced Quiz, get it to display on the front end of WordPress, or connect it to a Course or Lesson. However, a little nudging through the interface will get you through the hurdles soon enough, and when it does, you’ll have lots of options.
In general, here are Quiz capabilities with LearnDash:
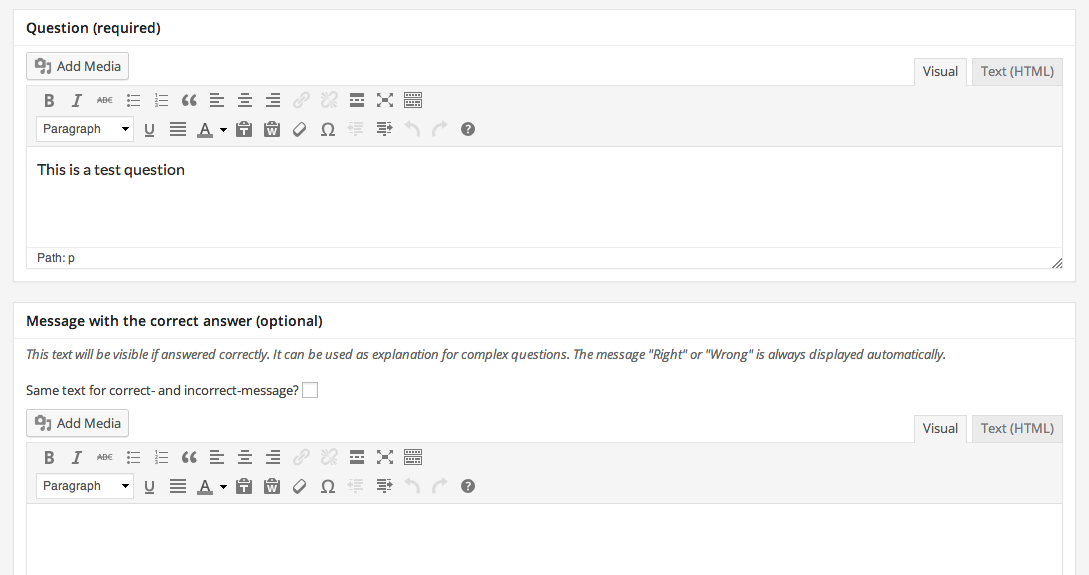
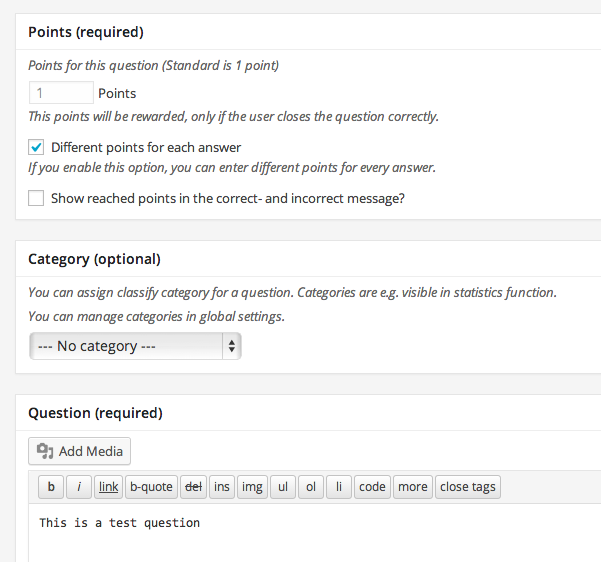
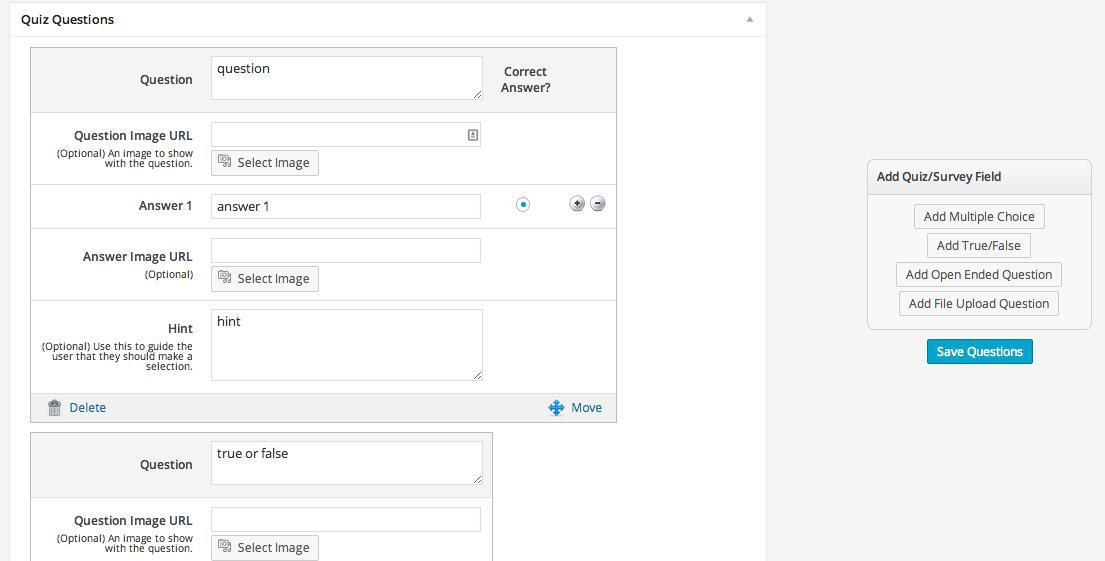
Quiz questions use an editing box that is similar to the Post and Page editor, where you can enter formatted text, links, images and other files.
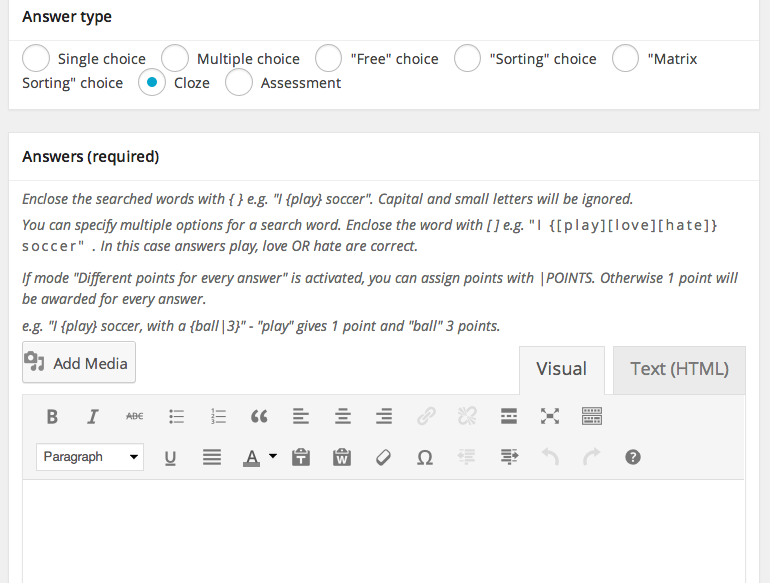
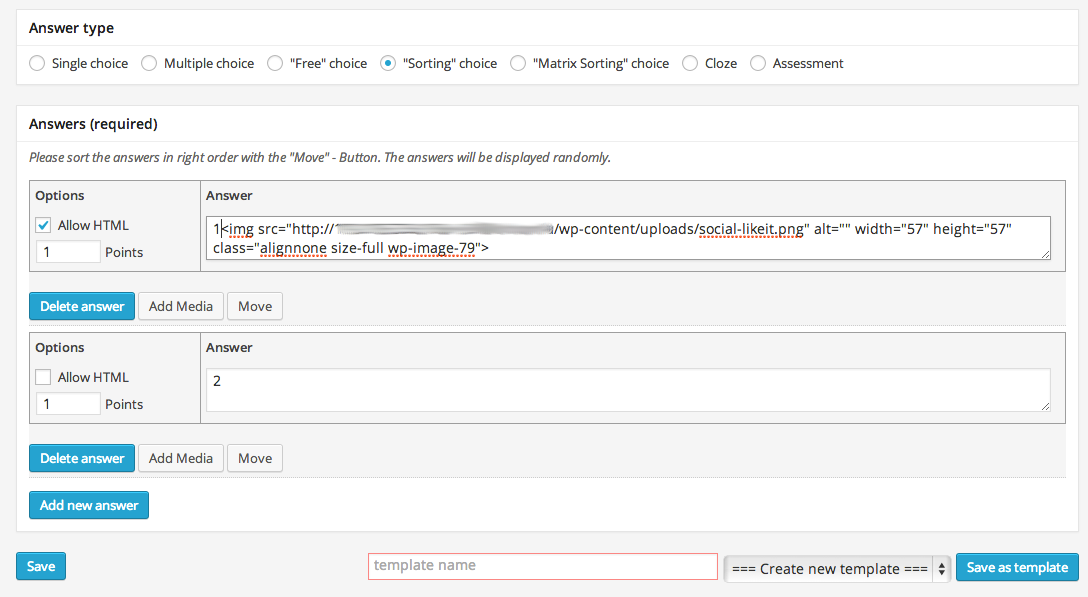
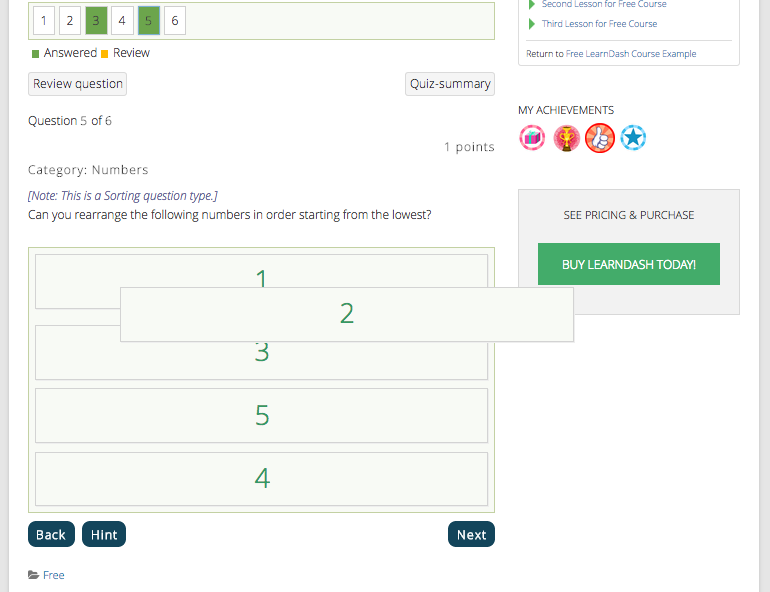
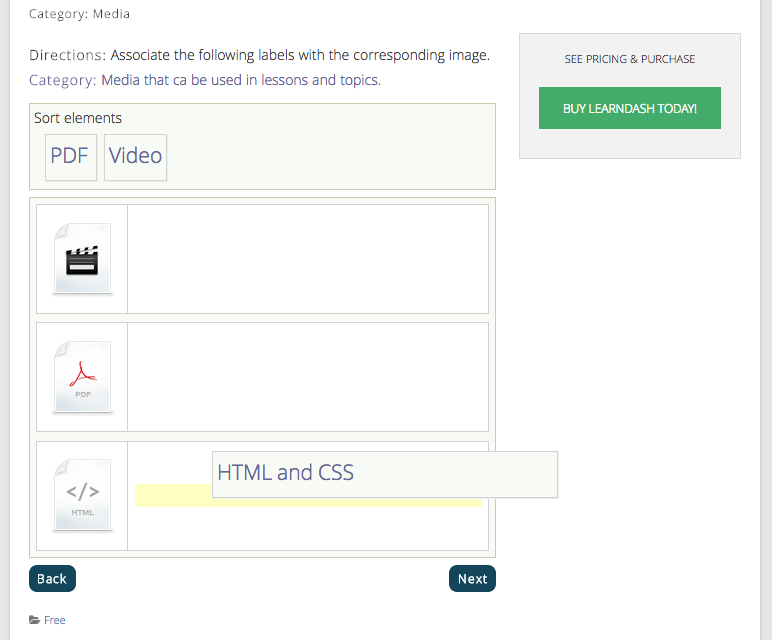
Questions in Quizzes can require the following types of answers: Single choice, Multiple choice, “Free” choice, Sorting choice, Matrix Sorting choice, Cloze or Assessment. Although they have confusing names and are even more confusing to set up, they are actually common question types that we are used to. For example “Cloze” questions are basically fill-in-the-blank questions (except explained in a more complicated way). The most unique question offering in this plugin is the sorting option, which asks users to match up words or pictures, or put them in the correct order.

Quizzes can have intro text (such as instructions) as well text to be displayed after results are shown.
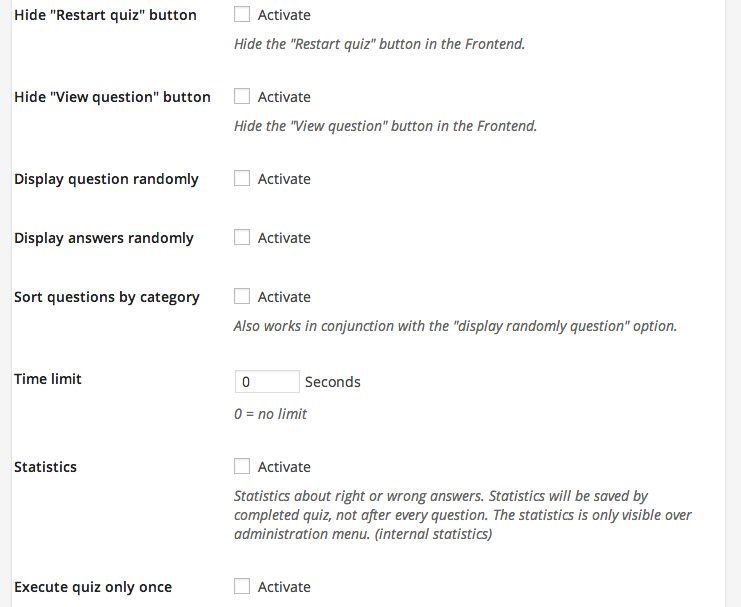
You can set the number of times a Quiz can be repeated. Advanced Quizzes can opt to have a “Restart” link and or be set to only allow one take.
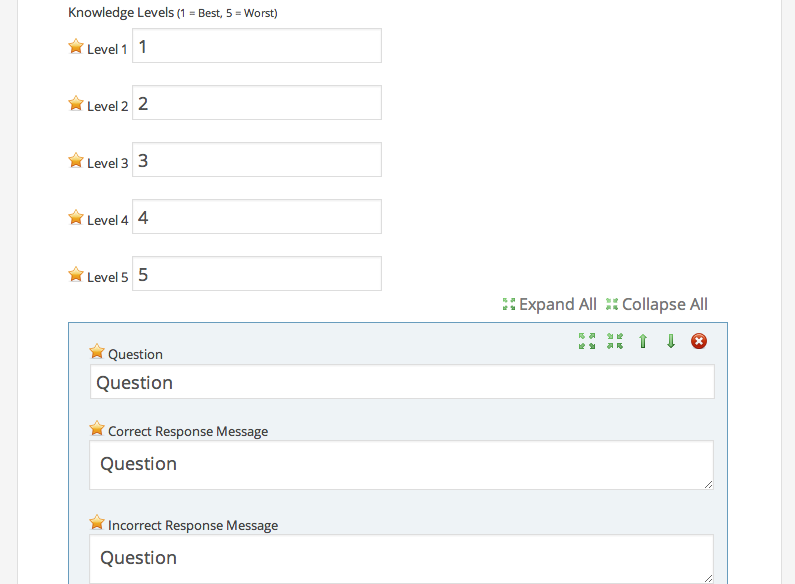
Quizzes have knowledge levels, which rate a user on a scale of 1 to 5 (such as being able to say they are an “Expert” level learner, though this is not part of the passing mark.
Questions and answers within questions can be moved up or down to change their order using simple buttons or a drag and drop feature in the Advanced Quiz area.
Advanced Quiz questions can have categories, which work with random question sorting. As Justin explains, “From a teacher stand point, categories allow them to see if there is a specific category where a student struggled most and can spend more time on that topic.”
Advanced Quizzes can have time limits and can start automatically when a page loads.
Advanced Quizzes can have overview areas that show a user how many questions they’ve seen, answered and have left to go. It also allows skipping a question and coming back to it later.
Quizzes can have both random questions and random answers. This means the correct answer can be option “B” in one user’s Quiz, while being option “A” in another user’s Quiz. In addition, the Quiz can show only a certain number of random questions from a set, to help randomize Quizzes for each user even more.
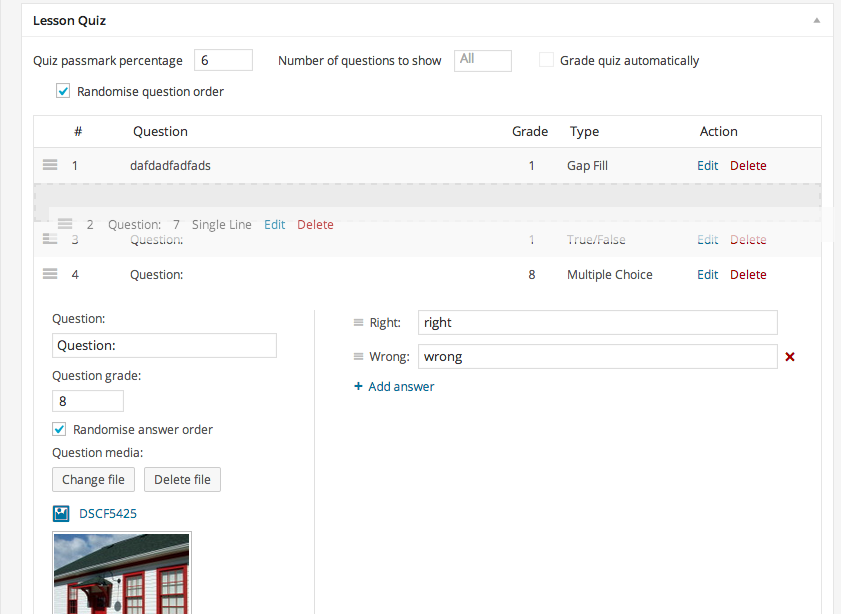
Questions can have a number of points assigned to them. This is great for teachers who want to assign more weight to one question over another. Not only that, each answer can have different points assigned to it, so with multiple choice, the ‘best’ answer can have more points, but a ‘good’ answer can have less, still allowing credit for effort.
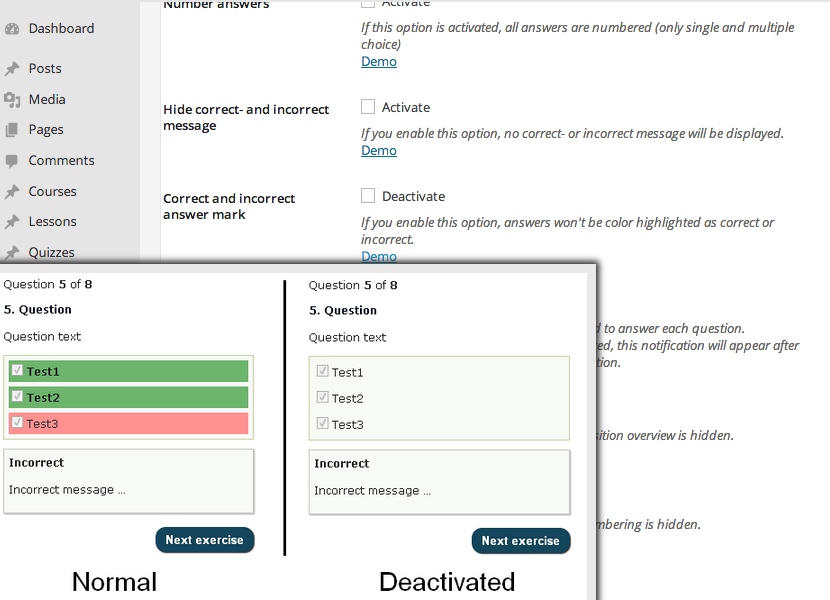
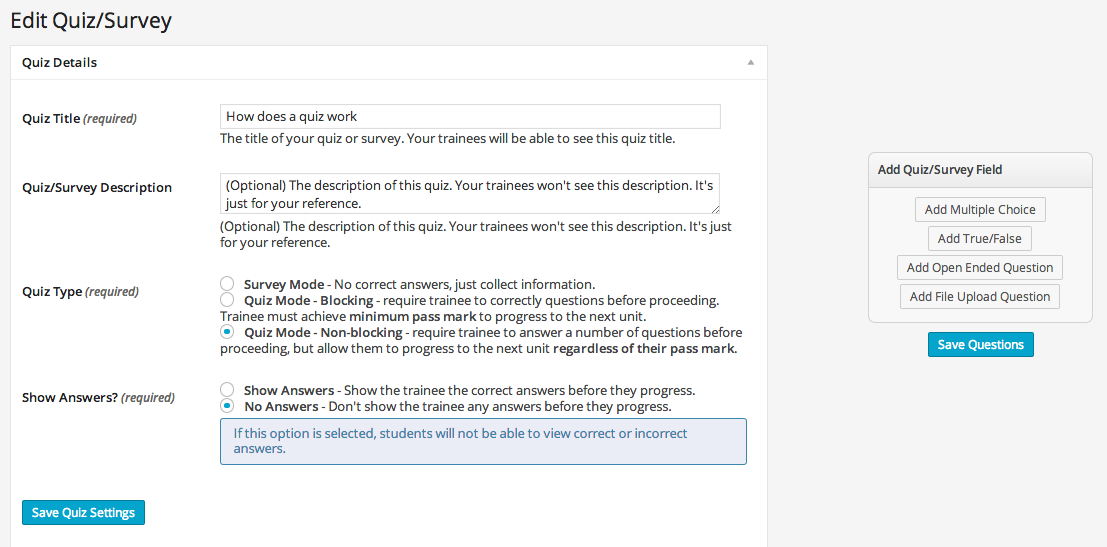
There are options to either show or not show a user if they got a question correct, or show the correct answer. You can also opt to either show or not show a user how they did overall. You can give a user a message or explanation after getting an answer correct or incorrect.
Questions can have “hints” which use a regular WordPress-type editor with all formatting capabilities.
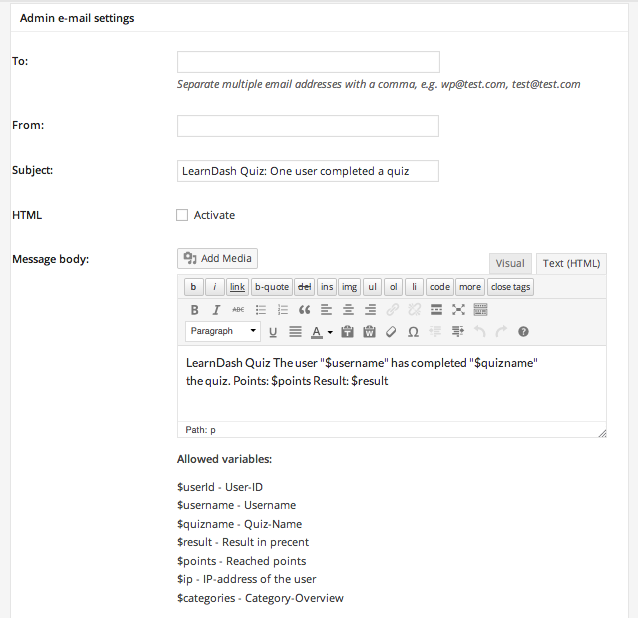
Advanced Quizzes can optionally have e-mails sent automatically to users with results.
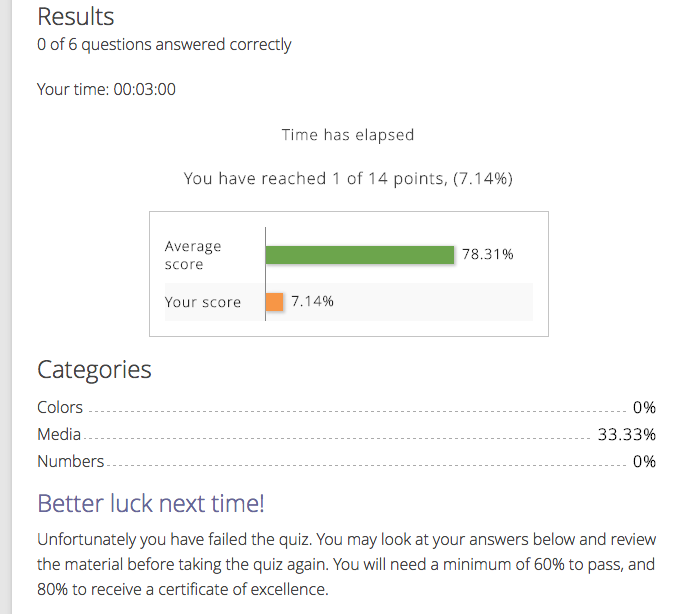
You can show statistics and average marks to users.
There is a Leaderboard option where students can publicly display their scores. The back end Statistics and Leaderboard area can sort through users to see their performance on a Quiz.
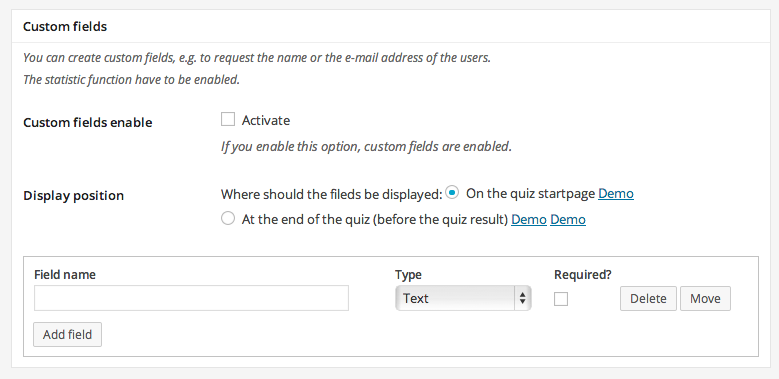
There are options to require users fill in a form with information before beginning a quiz (this is useful for entering things like student ID numbers at universities, or allowing the teacher to see the phone number, name and e-mail address right on the Quiz at a glance, like on traditional tests).
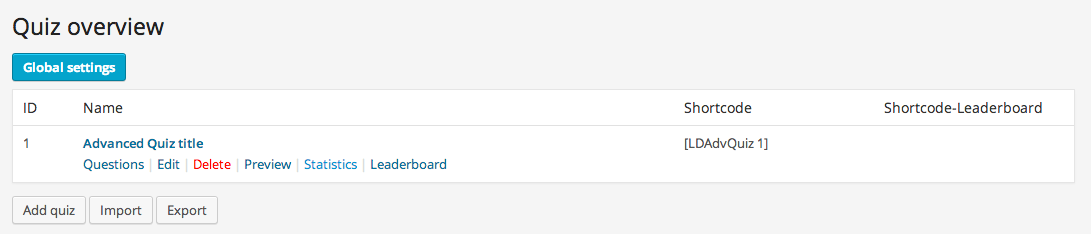
Advanced Quizzes and Questions can be templated for easy reproduction (see above screenshot).
Questions can be copied from other Quizzes.
Advanced Quizzes can be inserted into any Page or Post using a shortcode or by using a dropdown option in the “Quizzes” Custom Post Type.
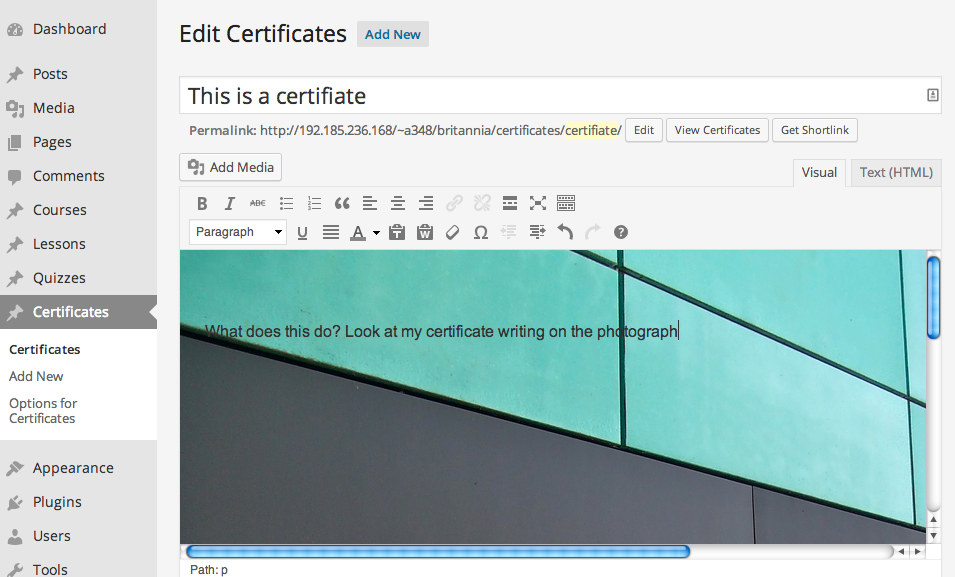
Certificates:
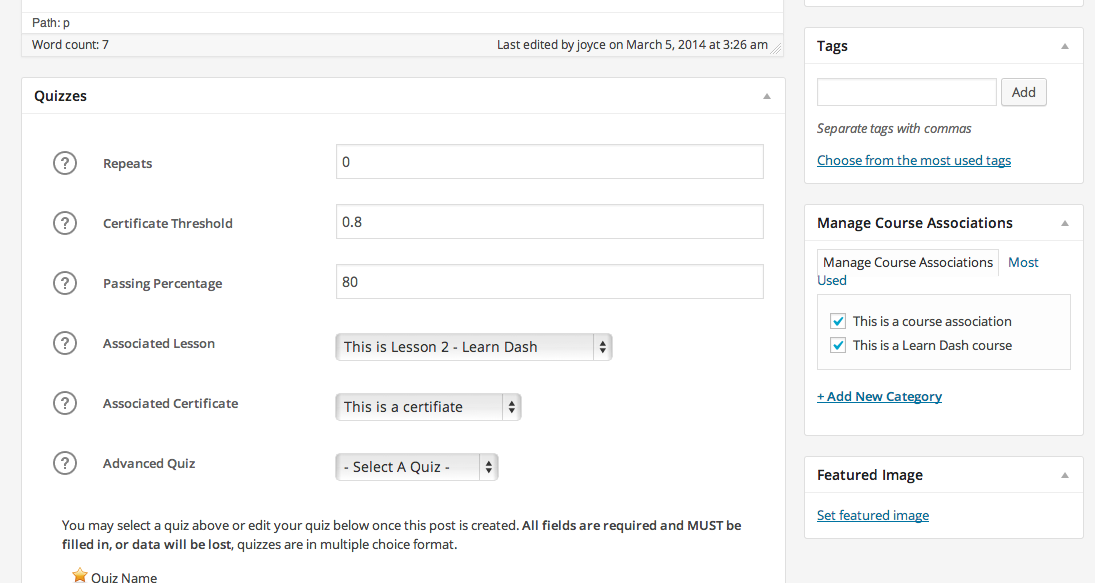
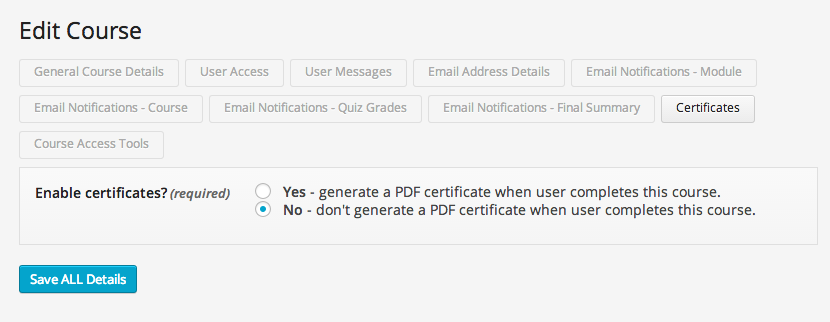
Each Course can have different certificates designed for it. A Quiz can be associated with a specific Certificate.
The way Certificates are added is through the Featured Image function in WordPress. From there you can enter text into the text editor, where the Featured Image is shown as a background. This can get tricky for ensuring proper alignment.
Justin explains that, “the certificate creation can take on many user meta data, which is only generated for the user to see and admin to access.”

Certificates are available for download after completing a Quiz, or in a user’s profile page.
You can set a passing mark for a user to get a Certificate. You can then have a separate “Passing Percentage.”
Development Needs:
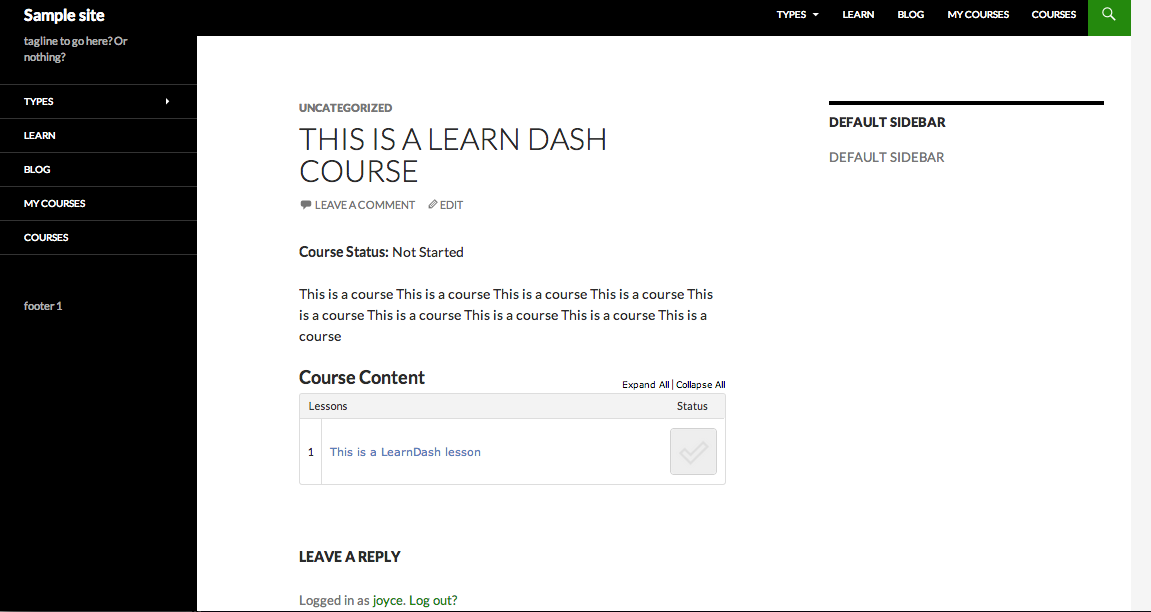
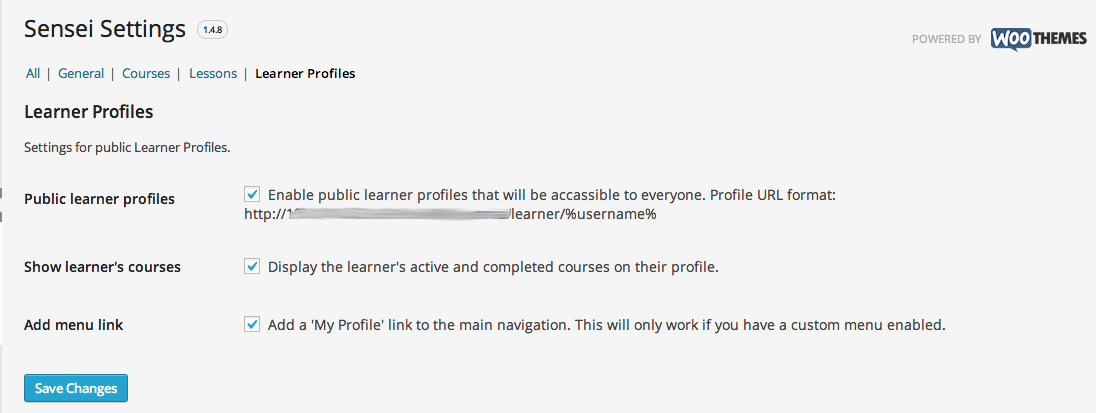
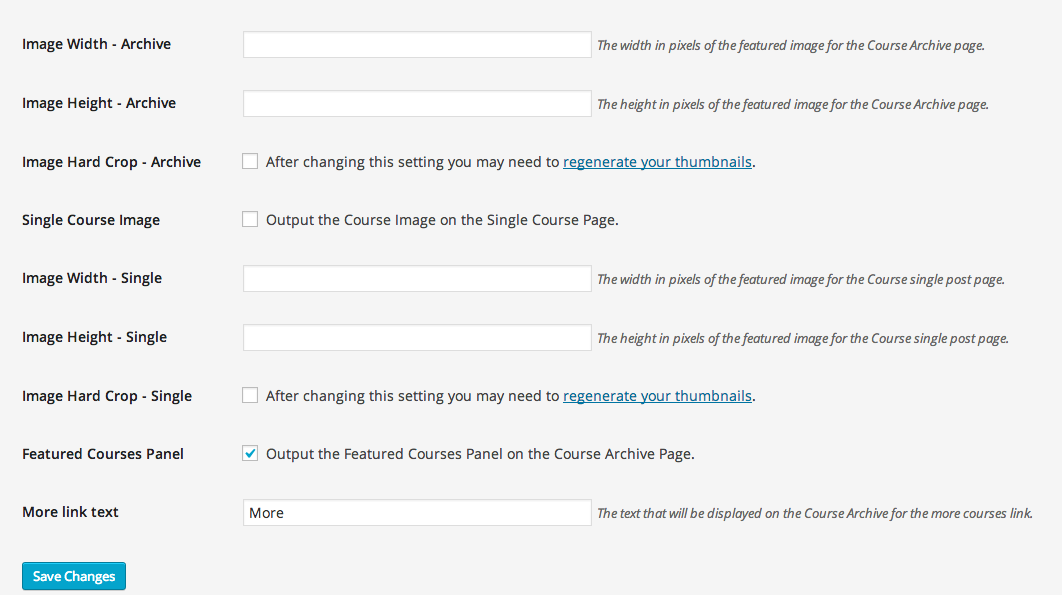
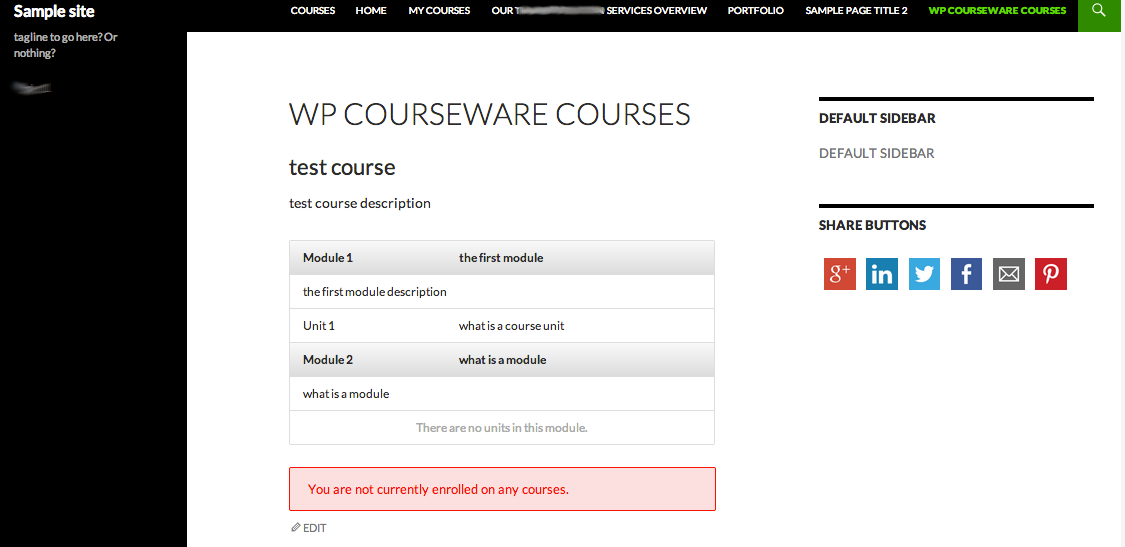
There are very little development needs with this plugin when it comes to displaying content on the front end of an existing WordPress website. The way it’s set up makes it extremely easy to fit into any theme, because its contents are contained within the theme’s ‘regular’ templates by using Custom Post Types.
In some cases it is useful to know how to use shortcodes, or how to customize CSS to override default styles the plugin uses. The plugin has an extensive list of shortcode options and variations to control the display of customized content very easily.
Pitfalls:
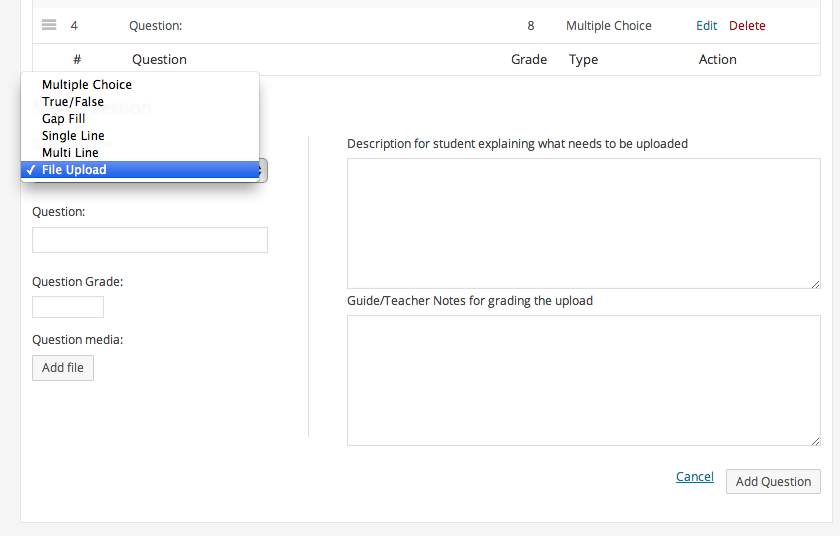
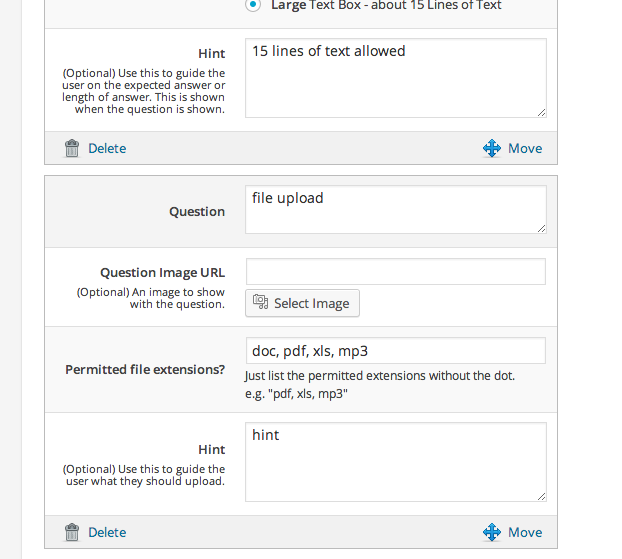
There is no way for a user to upload a file as part of a Quiz question. This can be problematic for accepting essays or other types of long-form answers.
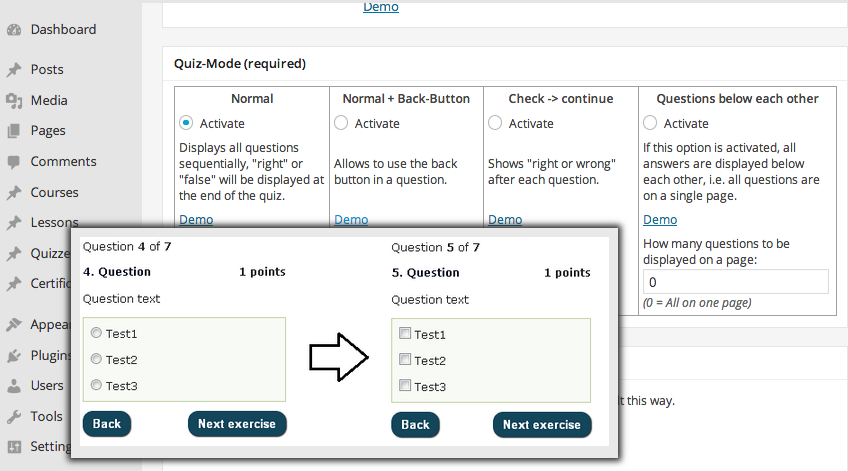
Creating some types of questions in the Advanced Quiz area can be difficult if you are not used to coding or logic (see above screenshots).
Sometimes there are so many features it is overwhelming to go through the set up of a Quiz. However, this is mainly a user interface problem that can be solved, since a difficult learning curve only needs to happen once.
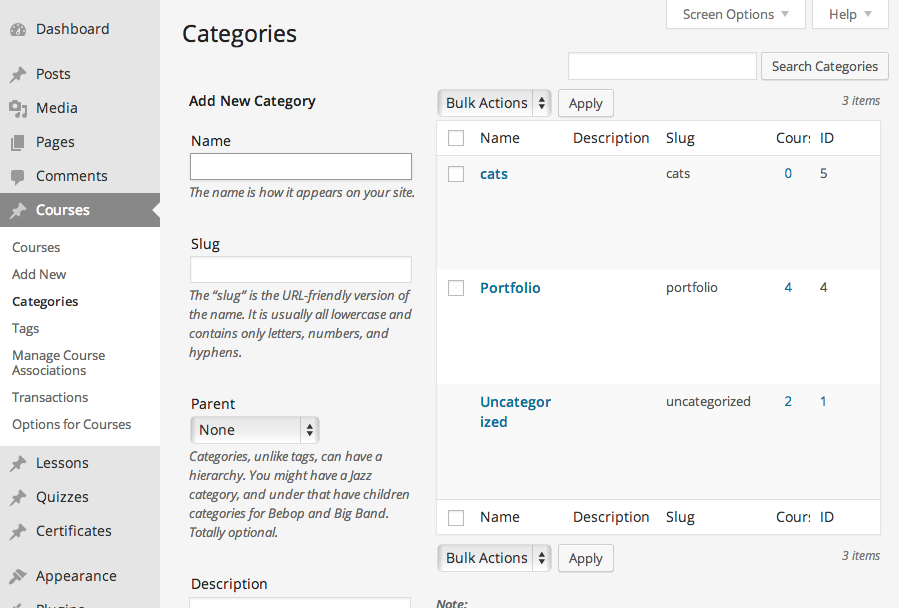
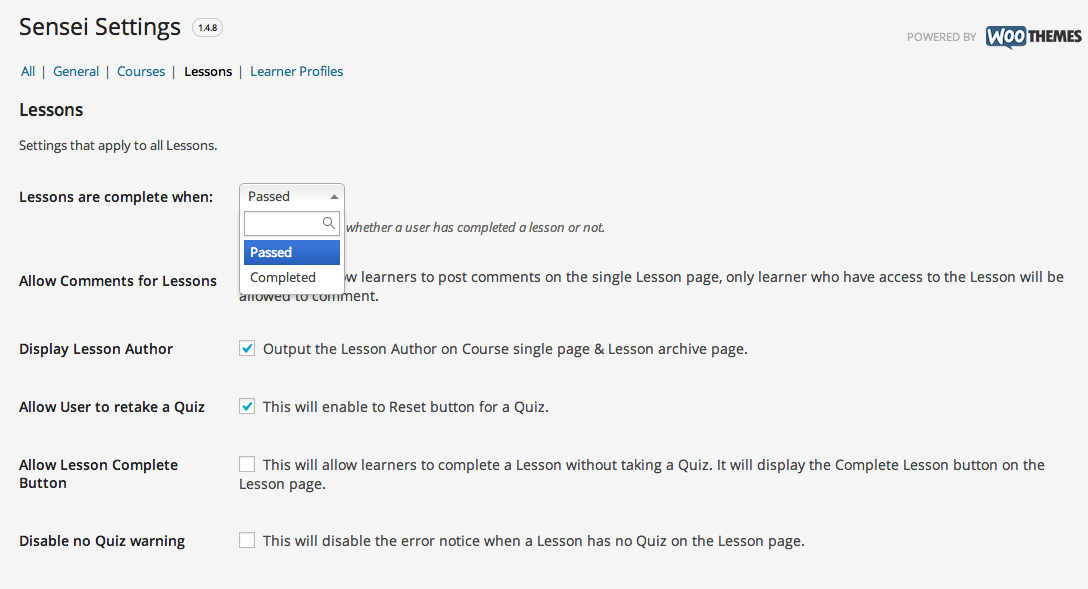
At present, Post categories and tags automatically become Course categories and tags, which can make it difficult to differentiate your blog content from your Course content, or at least keep them separate for organizational purposes (see above screenshot).
The Certificates function is a bit awkward to work with (see above).
As mentioned above, the user interface and learning curve is the hardest part to deal with when using this plugin.


