
| 1 | hot sprue bush (electrically heated) |
| 2 | manifold (electrically heated) |
| 3 | hot runner nozzle (electrically heated) |
Contents
Function:
- provide molten material to mold
- Hotrunners are basically an extension of the machine nozzle into the mold (Pass Through Channels)
- important that the hot runner system is dimensioned in relation to the shot volume
- no hold-up spots are formed (causing degradation of material)
-
controlled thermal expansion has to be calculated for nozzles

Risk:
-
Sealing is difficult as well because the melt doesn’t have any self- sealing at a gap formed between hot walls.
-
In case of mass leakage into insulating air gaps troubles will arise because of a 10 time higher heat transfer
- difficulties with color change restrict usage of internally heated hot-runners
- Thermal expansion of various components needs to be taken into account
Design:
Hot runner types:
You are trying to load a table of an unknown type. Probably you did not activate the addon which is required to use this table type.

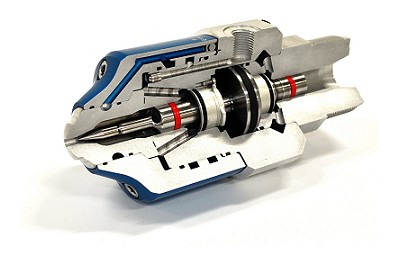
externally heated hotrunners:

- circular flow cross-section in the center of a heated tube or block.
- The heating elements should care for maintaining the temperature of the melt which means that the insulation to the outside should get particular attention.
- The main advantage of externally heated hotrunners is a better defined and better controllable mass flow
-
manifold is insulated using an all-around air gap (8-10mm)

| a | Manifold |
| b | support disk |
| c | tubular heating elements |
| d | centering pin |
| e | heating coil of the nozzle |
internally heated hotrunners:

| a | heating rod with cartridge heater |
| b | melt channel |
| c |
torpedo with cartridge heater |
- heating elements are positioned in the center of the runner channel: heating rods or so called “torpedos” with cartridge heaters inside
- self-insulation of solidified molding compound
- inexpensive but difficult to guarantee a safe mass exchange
Insulated Runners :

- Melt cools to form an insulating layer of solid plastic along the walls of the runner.
- The insulating layer reduces the diameter of the runner and helps maintain the temperature of the molten portion of the melt as it awaits the next shot
- runner volume does not exceed the cavity volume, all of the molten polymer in the runners is injected into the mold during each shot.
- This full consumption is necessary to prevent excess build-up of the insulating skin and to minimize any drop in melt temperature.
Advantages:
- Less sensitivity to the requirements for balanced runners.
- Reduction in material shear.
- More consistent volume of polymer per part.
- Faster molding cycles.
- Elimination of runner scrap — less regrind.
- Improved part finish.
- Decreased tool wear.
Needle shut-off nozzle :
popular due to advantages:
- good appearance of gate
- can be individually operated
- equipped with multiple gates and even no weld lines are appearing between the gates because of sequential opening and closing of the nozzles (“cascade filling”)
| Actuator for needle | |
| a | Pneumatic drive |
| b | Hydraulic drive |
| c | Electromagnet |
| d | servomotor |
Hot runner clamping nozzle:

Hot runner screwing nozzle:

Temperature Control:
- Each heating zone is individually controlled by temperature sensors.
- If multiple temperature sensors are used in different heating zones, a contour-dependent emperature control is possible.
- The sensors are combinable with all common types of nozzles,
“cluster nozzles”:
- For very low cavity distances multi-nozzles are appropriate

- Multi- needle shut- off nozzles with grouped needle drive but individual nozzle
Starting a nozzle:
1. Ensure “Soft Start” is selected on the temperature controller
2. Allow 10 minutes for the nozzle to heat up
3. Purge machine barrel before connecting to nozzle
4. Slowly bring machine nozzle up to hot nozzle to avoid damage
5. When nozzle is up to temperature you are ready to inject the mold
6. Check material comes out the gate and correct if required
7. Adjust nozzle temperature to get suitable molding (Note: nozzle will often need to run
hotter than barrel temperature to achieve a good result)
8. If the machine is left idle and only a single nozzle is used, (ie no manifold)
it is strongly recommended to gently purge the first shot through the nozzle.
This will clear any cool slug that may have formed near the head.