03 Jul

Best WordPress provider

trophy #1 icon BlueHost logo $3.95
  • Official WordPress.org #1 choice since 2005
  • Easiest 1-click install
  • Free domain name!
Visit site
2 ipage logo $3.75
  • Newly optimized for WordPress
  • Easy to use and inexpensive
Visit site
3 HostGator logo $3.96
  • 100% WordPress compatible.
  • Exceeds WordPress minimum requirements
  • Free tech support all Day Every Day and 99.9% uptime guarantee
Visit site
4 justhost logo $3.50
  • Free WordPress installation
  • Free domain
Visit site
5 FatCow logo $3.15
  • WordPress instant publishing, spam protection, themes and easy upgrades are standard
  • Free custom domain name
  • Unlimited email on your domain
Visit site
6 HostMonster logo $3.95
  • Unlimited space
  • Free email
  • Free online store
Visit site
7 Netfirms logo $4.45
  • Free listing YP.com
  • Easy Site Builder
Visit site
8 Dotster logo $6.75
  • Drag- and -drop site builder
  • Unlimited domains hosted
  • No. premium support without "Ultra" hosting package for $13.95
Visit site
9 iPower logo $5.95
  • Instant blogs, forums, and galleries
Visit site
10 dot5Hosting logo $5.95
  • Free domain
  • Unlimited email
Visit site
11 Start logic logo $5.95
  • Trusted by 100 k
  • Free domain
Visit site
12 entry host logo $5.95
  • Unlimited space
  • Free domain
  • Two site builders
Visit site
13 ehost logo $5.95
  • Unlimited space
  • Free domain
  • 24/7 support
Visit site
14 purehost logo $19.95
  • Free domain
  • 2 GB space
  • 200 email accounts
  • 24/7 support


In addition to the criteria of PHP, MySQL databases and storage space, the following factors have played an important role in the assessment:

  • Nicer URLs with mod_rewrite

On the server the Apache should have mod_rewrite enabled modules. "Nicer URLs" can be generated with this. Instead of cryptic URLs such as www.meine-domain.de?p=123 URLs can be created with easy to read file names: www.meine-domain.de/wordpress-hosting.

  • Easy installation using one click Installer

Many providers offer today a one click Installer, i.e. WordPress can be installed completely with just a few mouse clicks in the admin area. This function is most useful for WordPress beginners. Advanced users do not need this function actually, WordPress installation is very easy and usually no longer than 5 minutes lasts (simple installation guide).

  • Server availability

Just at commercial Web sites or ambitious Web projects, low downtime are important because downtime means often a loss of revenue. With the server-monitoring service Pingdom, I have monitored Web sites that are hosted at the four providers, for a month and every minute queried to determine so the downtime.

  • Maximum memory (PHP memory limit)

The PHP memory limit is the maximum allowed disk usage in PHP script. This limit is set by the service provider and should be at least 64 MB (better 128 MB) for WordPress. It is but the more RAM the faster/better running the scripts.


German provider

27 Jun

PowerPoint design

  • Templates online, z. B. GraphicRiver.net
  • Color scheme color.adobe.com registration necessary, complementary colors
  • SlideMaster use
  • Use the align ruler, grid lines


  • Bullet points

    • ALT + SHIFT + arrow results feed
    • Convert Bullet Point with the right mouse button in SmartArt

Graphics:

  • Google / images
  • search for "Plane Vector" shows vector images
  • PNG is perfect, because vector image with transparency
  • other vector images have white background
  • Select default graphics with uniform background color
  • Background can be removed using format/picture tools (not exactly)
14 Jun

Sensei tutorial

https://managewp.com/Sensei


Sensei by WooThemes. You may know WooThemes for WordPress template designs and their their popular e-commerce plugin, WooCommerce. Well now that amazing team is working on to LMS plugin for WordPress as well. We tested their latest release of the plugin and so interviewed the lead developer on the project, Dan Johnson. Below are our findings, which we hope will help you chose the right option for your e-learning needs!

Sensei by WooThemes

Biggest marketplace advantage: this plugin's core strength is that it integrates with a well known and widely used theme marketplace (WooThemes) and e-commerce plugin (WooCommerce), for selling courses online. It of therefore has the most ' Plug and play ' qualities with its back end user interface, meaning it is the easiest plugin to learn how to use.

Summary: Being one of the newest learning management system, this plugin is slowly growing its feature set and is backed by a 'big name' brand in the premium WordPress space. This indicator is that you can expect good support and future growth. However, at present, it is not as extensive as competing products.

Tom wrote about Sensei on the ManageWP blog last year. Sensei has extensions allowing you expand its possibilities. Albeit, there are only three right now. However, they are important to know about because when you compare the plugin to its competitors, these extensions 'fill the gap' with features you may be looking for: certificates, media attachments and modules.

Sensei-guitar-courses-sample

Note: you can click on the screenshots below to enlarge them.

Sensei features

Structure, controls and interface

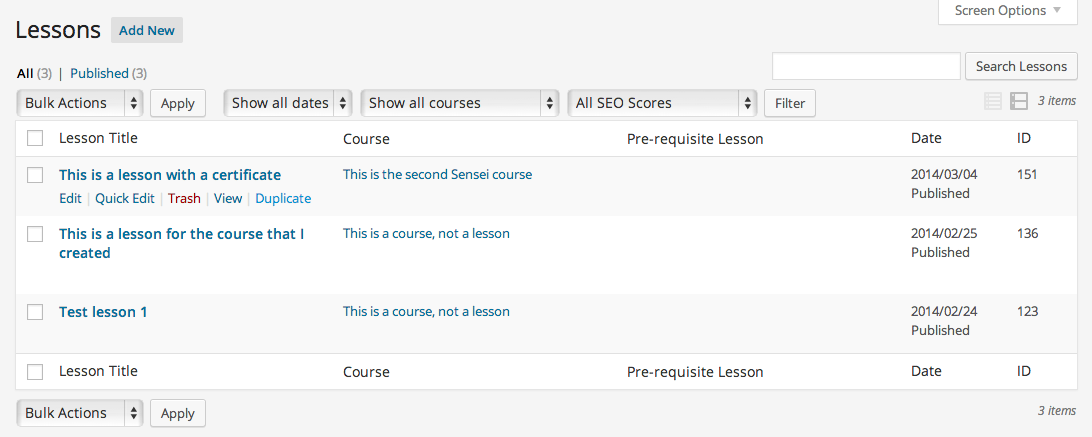
There are courses and lessons in Sensei. Lessons go inside courses but you will mainly be working with lessons, which is why it's the most dominant menu item ("Courses" confusing is a sub menu item under "lessons," which makes the order).

Sensei-side-menu-and-overview Sensei-lessons-list-screen

Each course has a custom field for embedding a YouTube or Vimeo video. The course video would theoretically be used to advertise the course publicly or provide a sample lesson.

Sensei-single-course-editing-fields

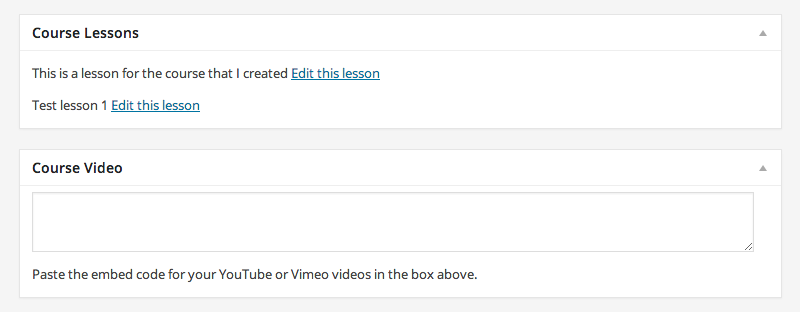
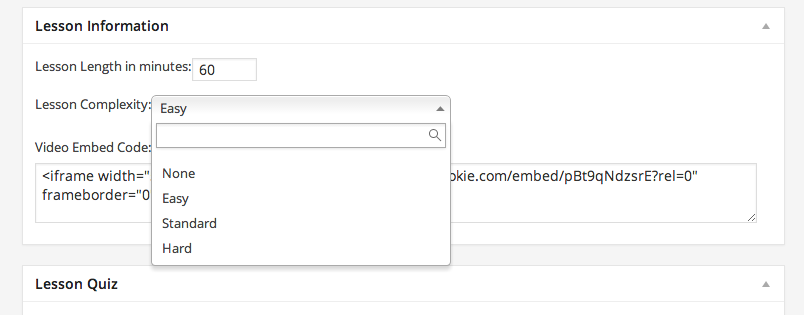
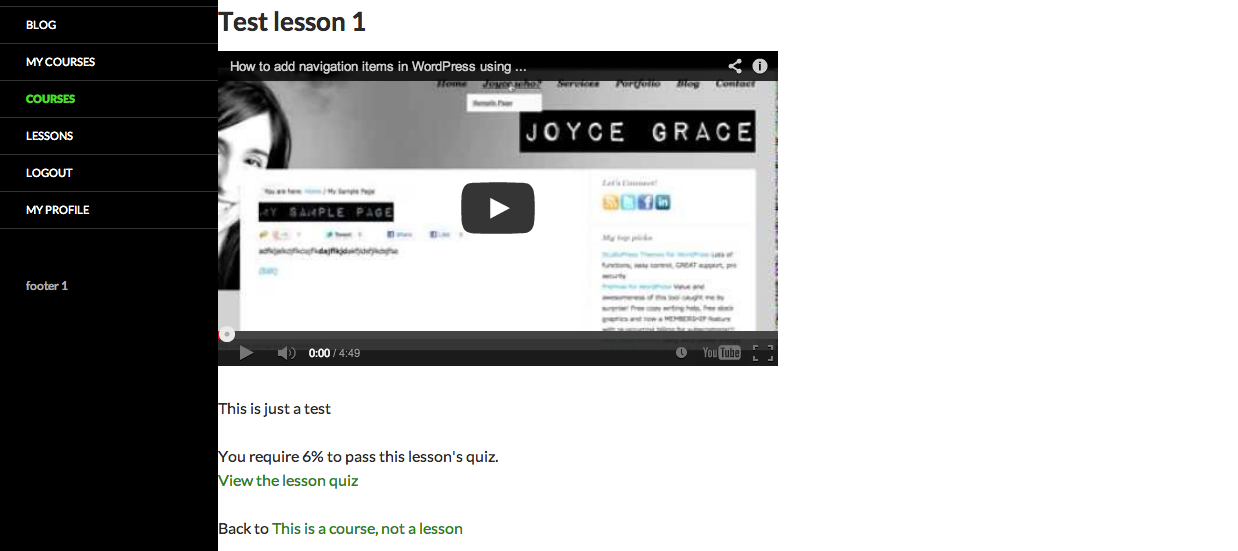
Each lesson (which goes inside a course – remember that) has a custom field allowing you to embed a video. Lesson videos would contain private instruction (see screenshot below).

If you want lesson videos to be private and not something someone can grab freely on the web, you need to use a paid service like Vimeo plus, which allows specified rules for where videos can show on the web. Alternatively, you can self host videos by clicking "the WordPress add media" button in a lesson editor (though there are caveats with self – hosting video).

Courses can be "featured." A shortcode can be used to display "Featured" videos on a page or post in WordPress.

Sensei-single course editing screen

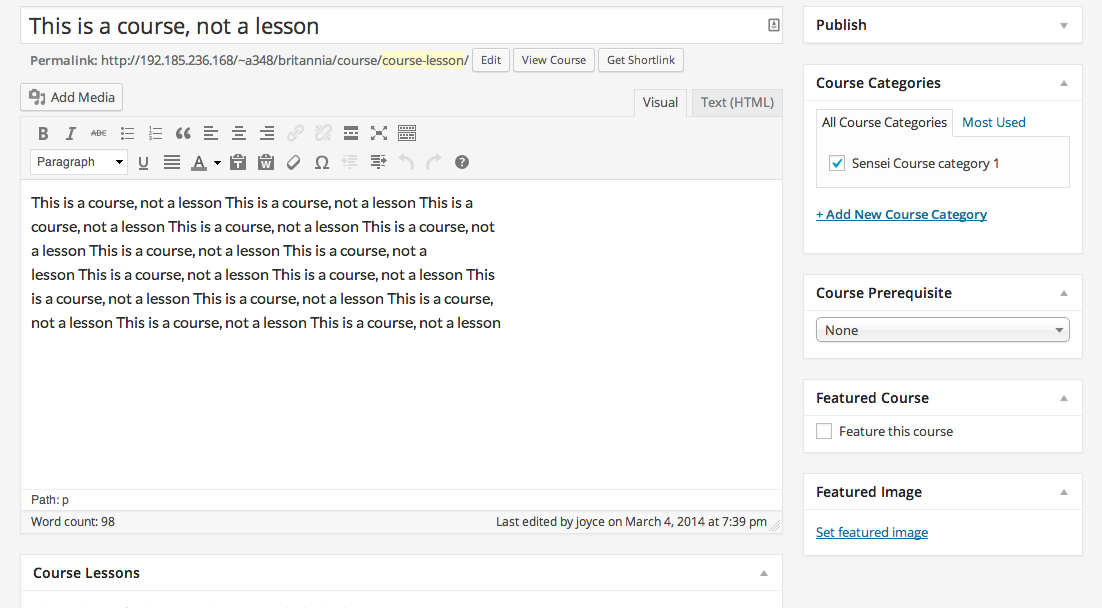
Courses can have one pre-requisite each, which is selected through a drop-down menu on a course-editing screen. This editing screen is much like the 'regular' WordPress page or post editor.

Sensei-lesson-prerequisite-drop-down

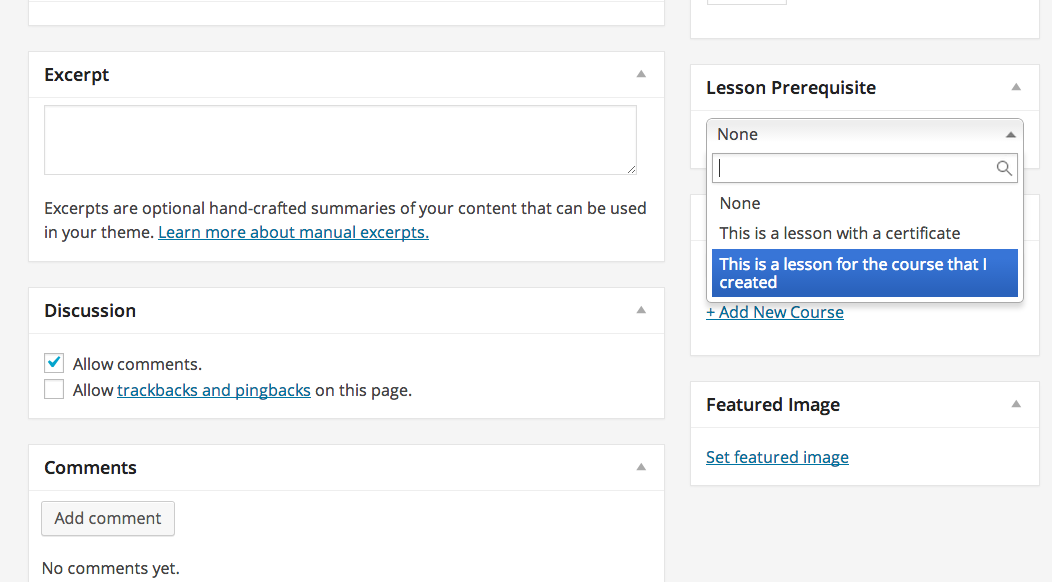
Lessons can have one pre-requisite each (another pre-created lesson). The way you make sure someone has taken a course as a pre requisite is by making sure the lesson pre prop is not in any other course (which it can be).

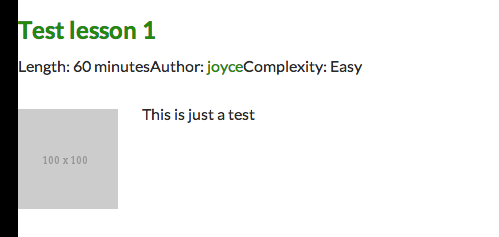
Lessons have to option to enter length and complexity. This information can be helpful for students who want to know what their time and 'brain power' investment will be. For example, I may not want to start a "Hard" course that is 2 hours long shortly before going out to dinner, or entering a meeting. But (if Lessons don't have pre-requisites), I can move on to a 20-minute, "Easy" rated session, coming back to the more difficult one later.

Sensei-lesson-difficulty-and-options

Courses can have categories, lessons can have tags, but not visa versa.

Sensei-course categories screen

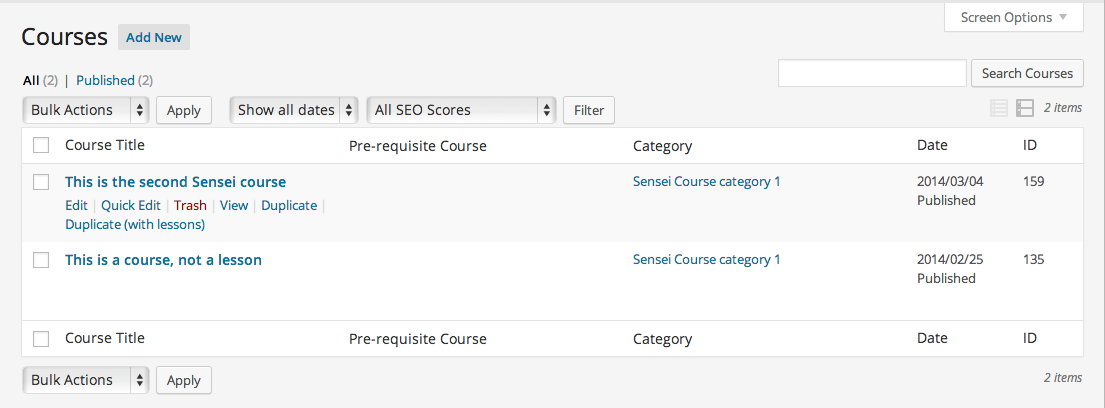
Courses and lessons have a "duplicate" option in WordPress, for easy re-creations.

Sensei-courses-list-with-duplicate-option

Lessons can enable comments, which can allow for class discussion. But after the semester is over you'll either have to delete the comments or replicate the course and all its lessons to 'clean up' the comments area. (Personally I think you shouldn't use the comments feature for class discussion because it will be hard to organize topics.) Rather, opt for a forum plugin like BuddyPress or bbPress. The Sensei team has notified me they are looking into on integration of this type because of its popularity on their idea board.)

Lessons can have on order number (this is key if you do not want them ordered by date created).

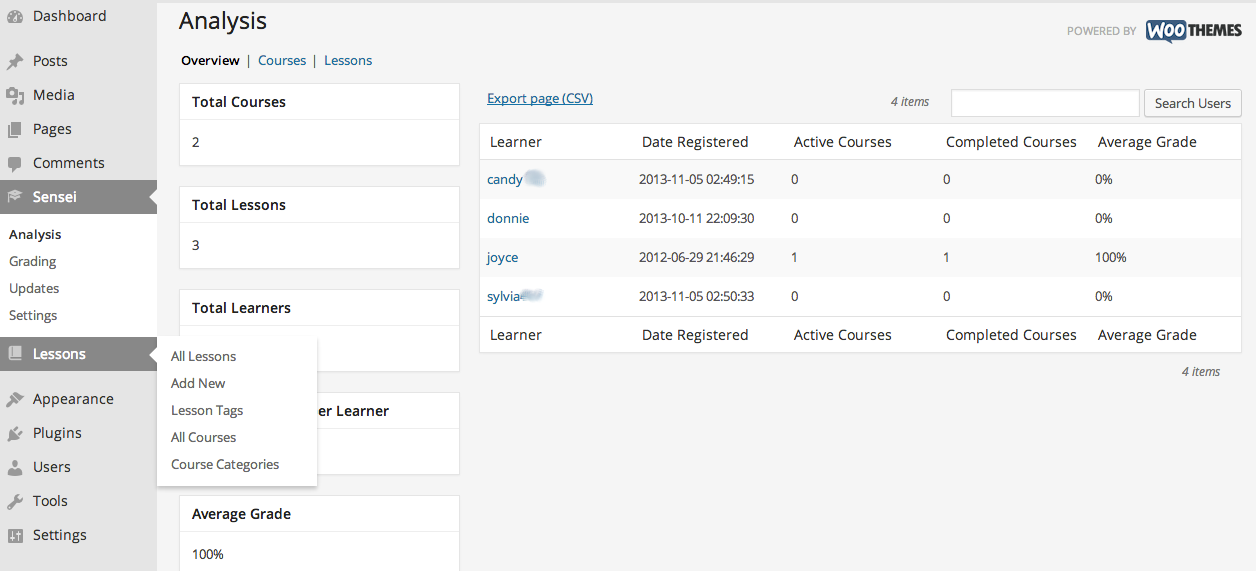
CSV export are available for learner, course and lesson information on your WordPress install (see link on "analysis" page screenshot above).

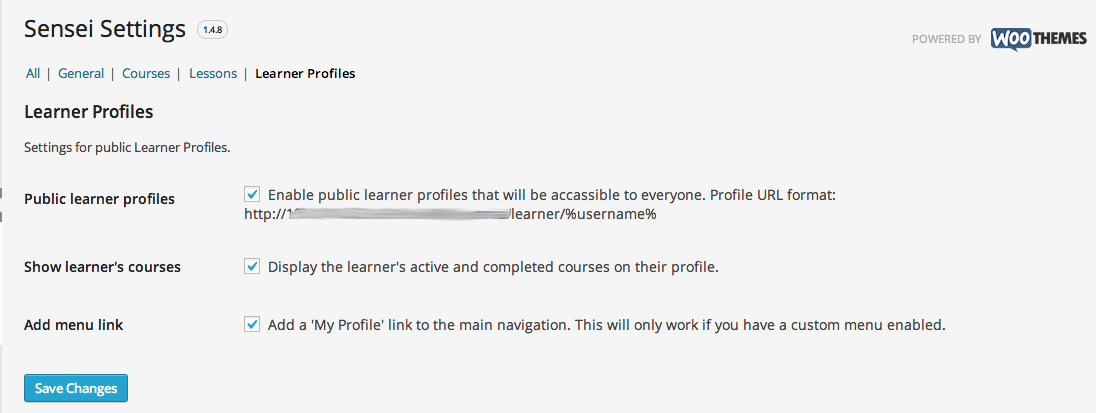
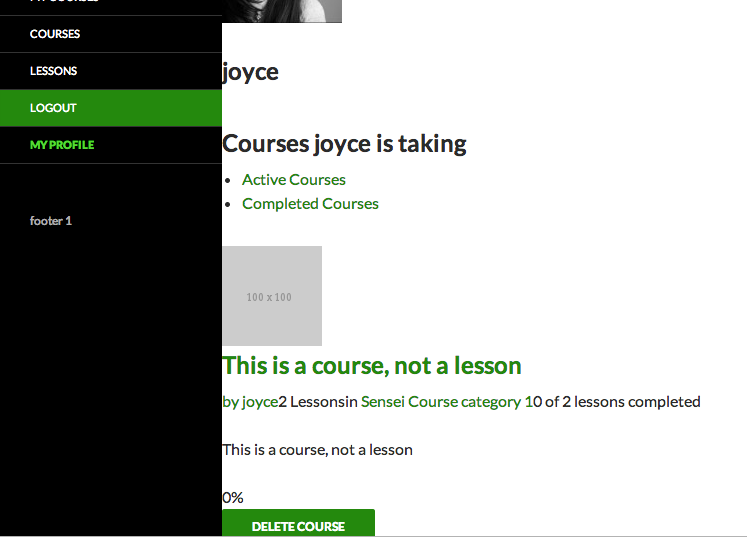
Learner profiles can be switched to private or be made public.

Sensei-learner-profiles settings-page
Sensei proflie-page-front end

Quizzes and marking

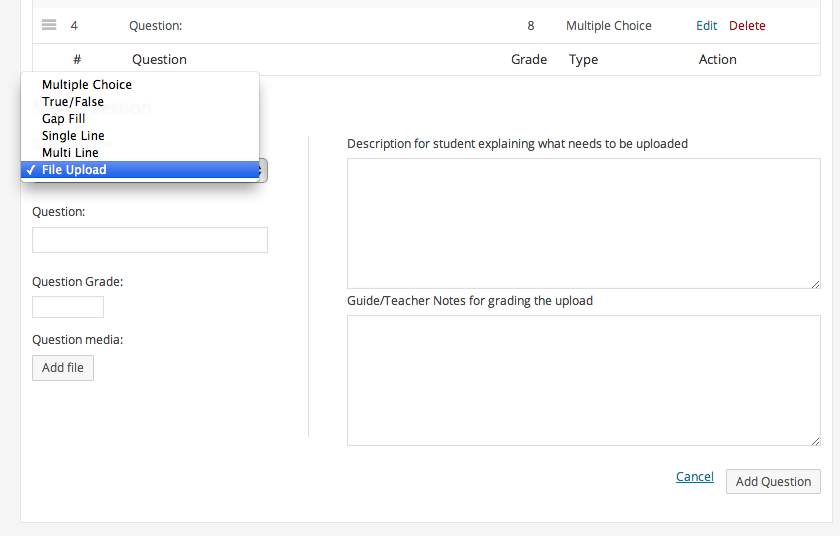
Lessons can have complex quizzes allowing for combinations of question types containing everything from multiple choice, true or false, fill in the gap, short answers, long answers or uploading a file. This is a major improvement in Sensei's latest release, and well done too, since it what one of its weakest points brought up in reviews around the web.

Sensei-quiz-settings-drag Sensei-quiz-file-upload

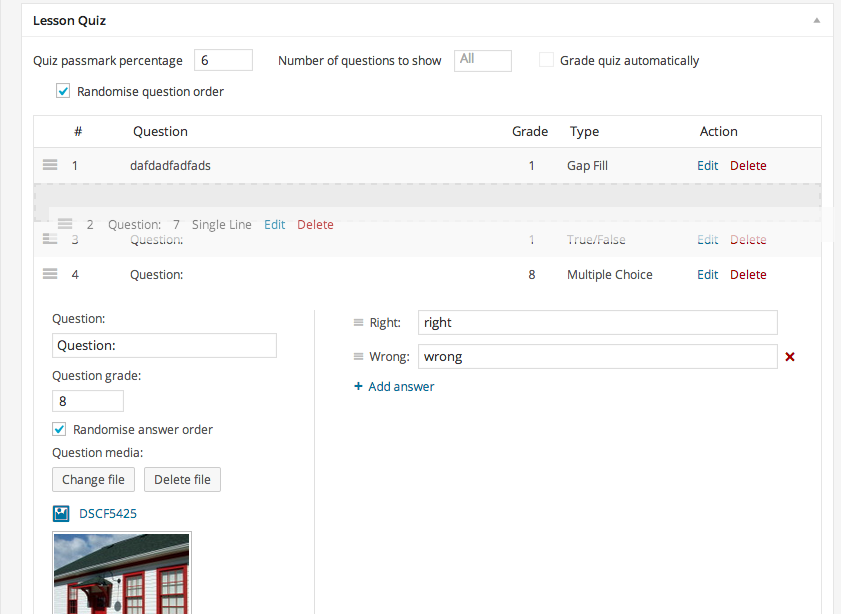
Quiz questions can now have media attached to them, as with WP courseware.

Quiz questions can have a randomized order, which helps prevent cheating.

Quizzes now have a drag and drop re-ordering feature (see above screenshot).

Quizzes can have a minimum passing percentage assigned to them, to automate grading and save teachers time. Automatic grading grading can therefore be turned off to allow for manual.

Quizzes can be re-taken if you check the box to allow this under "settings."

An "Analysis" (see above) and "Grading" area shows stats about courses and learners including average level, and the number of completed courses.

Sensei-grading-screen

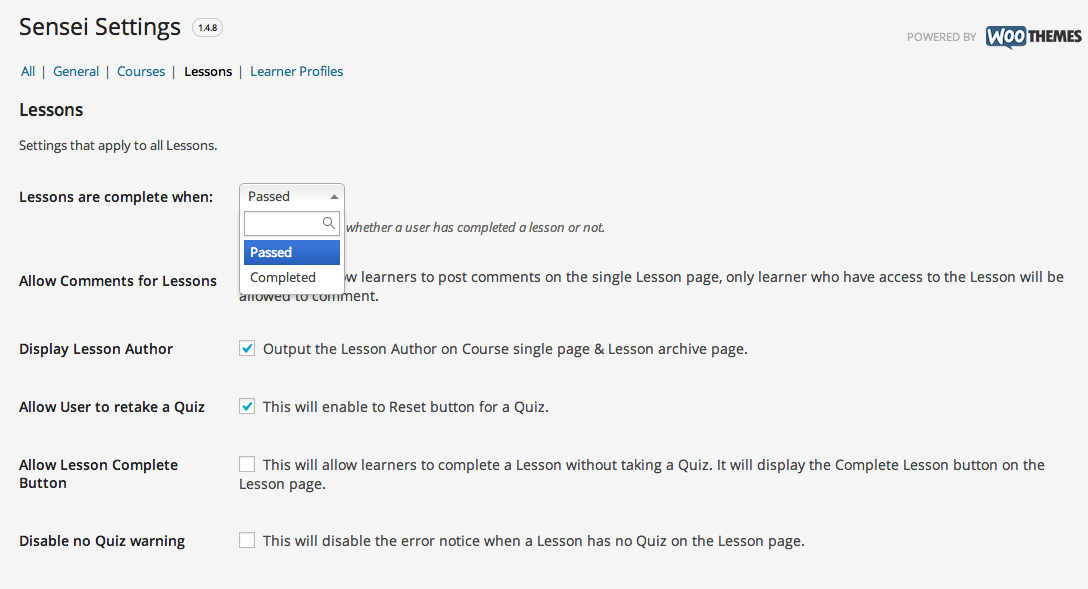
Plugin-wide settings in Sensei allow courses to be marked "complete" either when a user actually finishes all the lessons, or when they achieve a passing mark on the course.

Sensei-complete-when-passed-lesson-settings

Certificates

The usage of certificates requires downloading extension to Sensei. Currently this is free.

Certificates can use custom templates or a default template that comes with the extension.

You can assign a different certificate design to different courses.

Certificate awarding can be controlled so that a student only gets the certificate if they've passed, not just completed a course. A controls this plugin-wide setting (see screenshot above).

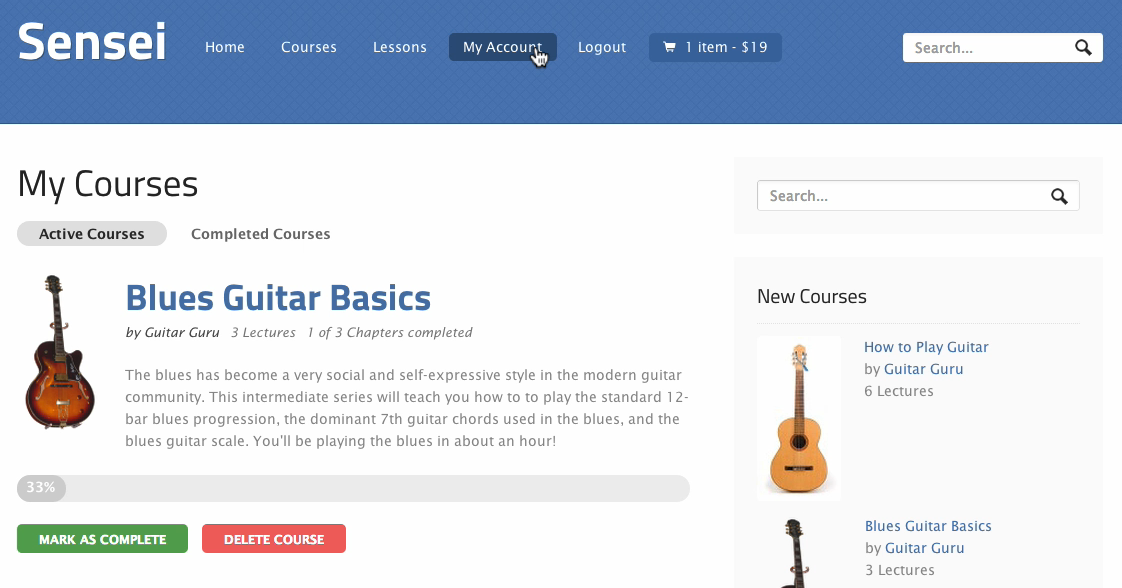
Certificates are sent automatically and can not be manually re-sent by a teacher. However, they are always available in the My courses area of the plugin, where users manage their courses.

(Note: certificates did not work on my installation while doing testing, so we couldn't get you our own screenshots, however we did not pursue extensive troubleshooting for lack of time.) Note that you would get support when buying a WooThemes product to solve issues you may have around this.)

Development needs

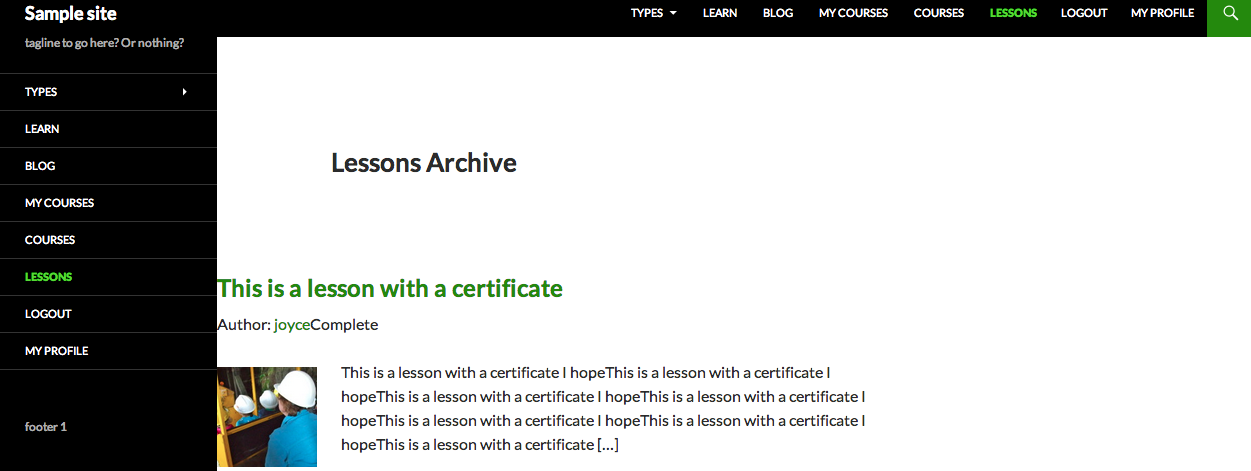
Sensei can be customized with templates (requiring coding skills) and some dashboard settings (mainly to determine image widths), but works best out of the box with select WooThemes. In other words, if you plan to use a non-Woo theme, you'll need to be prepared for some coding work to get it to look right in some cases, even on the TwentyFourteen 'default' theme that comes with all WordPress installation.

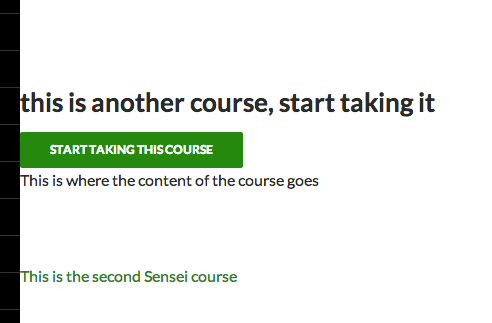
Here are some screenshots of what the plugin pages look like on TwentyFourteen (see above those). Notice how the default sidebar show does on these pages (they do not integrate with your 'regular' theme pages or templates) and how the meta data wording bunches up against each other, not to mention the margin and padding issues:

Sensei-lessons archives not formatted Sensei-front-end-single-lesson Sensei-no-formatting-needs-css

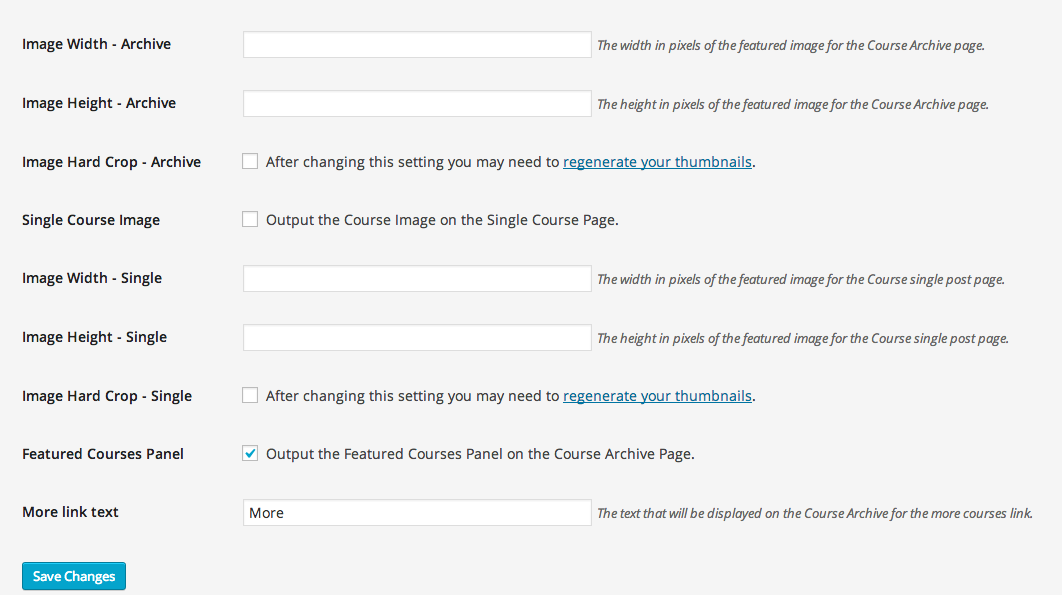
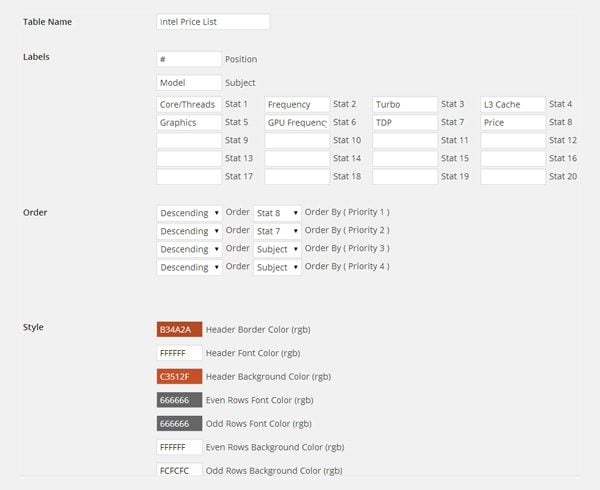
Here is example of some image settings to control display with Sensei:

Sensei-image settings

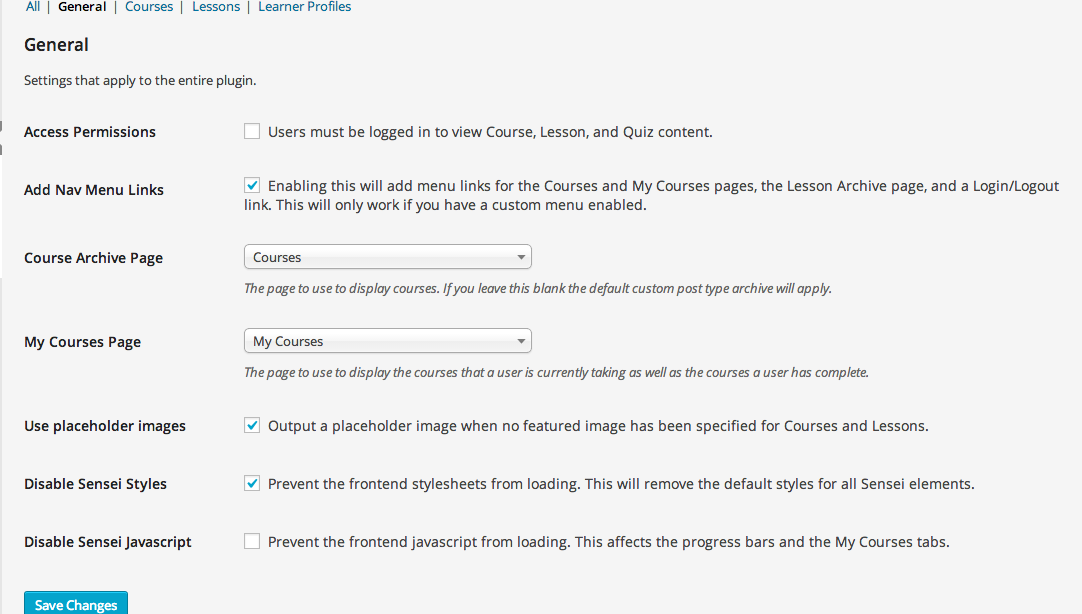
Other general settings allow you to control where CSS that is pulled from:

Sensei-general settings

According to Dan Johnson, who heads up the Sensei team at WooThemes.

For other non-Woo themes, it's usually just a case of adding some code to the wrapper files as described[here]. Unfortunately, there simply isn't a way to make Sensei work seamlessly with every theme automatically.

Otherwise, we have a variety of themes (including a free option, Mystile) which all work well with Sensei out of the box. You can view all of our themes that work with Sensei here.

Pitfalls

As explained above, if you're not a developer, and do not want to use WooThemes, it may be hard for you to get Sensei looking pretty. In June of 2013 (before their latest release), one blogger wrote about the development weaknesses surrounding Sensei integration with other themes.

There is no option to add or remove learners from a course, no. way to bulk import learners, and no way to select current users on the WordPress install to be part of a course unless you are integrating the plugin with WooCommerce (which will allow you to do so by manually creating to 'Order'). However, there is a button that says, "Start taking this course," on the front end of a Sensei page, which allows any user to start a course. Whether the course is paid or free, once they click on that button, that user is automatically added to the "Analysis" area, which can filter the users in each course. But they can't be removed, unless, as Dan explains, you use a "function to add/remove users from courses, but it requires adding a small snippet of code to one of your theme files."

Sensei start taking course

Sensei at present is not meant to be on all-powerful LMS, as others on the web have noted (or complained about). As Daniel Threlfall says on CMS critic,

It's the perfect solution for selling educational services from a blog, or providing employee or subscriber training. It is not, however, designed for large-scale usage by educational institutions.

06 Jun

Restore a backup made by plug – in BackUpWordPress

BackUpWordPress saves a backup copy of your site files and / or database. If you need to know how to retrieve and restore from your backups, here is our mobile guide: Please note that once a restore has been run on either the database or site files, you will not be able to retrieve the previous version so you may wish to create a last-minute backup of your database and files locally just before you run the restore process.

Download

There are 2 ways to do this:

1. Within WordPress dashboard go to tools – backups. This will take you to the manage backups page.
The manage backups page will let you select from all of your backup schedules. You should'nt click on the schedule that you require. All your backups for the schedule will be listed in date order. Select the latest backup from the top of the list and click on the download link to save it locally.

2. Connect to your site via FTP. Look for the wp-content folder and inside it you will find a folder called backup containing zip files of all the latest backups named by backup date. Select the latest backup file and transfer a copy locally.

Unzip

Once you have a zip file of the latest backup saved locally, unzip the files. In OS X, you can simply double click on the file. In Windows, you can use an archiving tool to extract the backup file (there are many available for download on the internet). The unzipped file will contain your database file (ending. sql), your sites files or both, depending on how you have configured the BackUpWordPress settings. The default setting is for both database and site files to be backed up.

Restore your files

The backup site files consist of three folders called wp-admin, wp-content and wp-includes plus a number of php files and a .ht access file. You will need to upload site files to your site and overwrite the existing files. This can be done via FTP using the file manager provided by your hosting company panel or via on FTP or SFTP client (such as FileZilla for PC or transmit for Mac). Make sure you choose to replace the existing files with the new ones. If you are restoring your site after a hack or virus attack, it is better to delete all site files prior to uploading the new files in case additional files have been added.

Restore your database

You will then need to import your database. This should automatically overwrite the old tables. There are a number of different ways that this can be done:

  • Using a tool such as phpMyAdmin. This and similar tools are usually available via your hosting company panel.
  • Using a desktop tool.
  • MySQL commands via the command line prompt.
  • For more information see WordPress codex article on restoring your database from backup.
Again, if you are restoring after a security breach it may be better to delete all old database tables before importing the new ones.
Using phpMyAdmin

phpMyAdmin is a program used to manipulate databases remotely through a web interface. A good hosting package will have this included. For information on backing up your WordPress database, see Backing up your database.

Information here has been tested using phpMyAdmin 4.0.5 running on UNIX.

The following instructions will replace your current database with the backup, reverting your database to the state it what's in when you backed up.

Restore process

Using phpMyAdmin, follow the steps below to restore a MySQL database.

  1. Login to phpMyAdmin.
  2. Click "Databases" and select the database that you will be importing your data into.
  3. You will then see either a list of tables already inside that database or a screen that says no tables exist. This depends on your setup.
  4. Across the top of the screen will be a row of tabs. Click the import tab.
  5. On the next screen will be a location of text file box, and next to that a button named Browse.
  6. Click Browse. Locate the backup file stored on your computer.
  7. Make sure SQL is selected in the format drop-down menu.
  8. Click the go button.
Now grab a coffee. This bit takes a while. Eventually you will see a success screen.
06 Jun

WordPress as a video portal

     WordPress can be used for many things, such as wiki, bookmark service and much, much more. Today, it should be important to use WordPress as a video portal.

Preparation and consideration

Features of a video portal are of course a comment feature, function and of course search rate a video. It is of course understandable that one can create not a so extensive video portal like YouTube or MyVideo with WordPress but for own videos just fine. There is also the advantage of this video portal, you can integrate the videos only via embed in WordPress function.

Of course, you can upload the videos themselves with WordTube and play. Thus, you get an own Videportal much closer. There is also the advantage that you can incorporate advertising, which you can set with WordTube. Services like CaptainAd is but also for videos possible, that you get this from YouTube or other services, just make one advertising not itself set.

How do I make a video portal from WordPress?

This is more than simple, since there are numerous video themes for WordPress, I want to list the following:

  • Elegant themes: eVid – an attractive and extensive Videotheme you get with eVid. It includes all the functions that I have enumerated input and as a special feature you can even the darken background – demodetails
  • Woothemes: WooTube – not as many features, there's different theme – demo – details
  • Woothemes: Groovy video – very similar by functions such as WooTube, only completely different construction. -Demo – details

You can see, how easy it is to set up WordPress as a video portal. Maybe someone WordPress uses for its video portal.

06 Jun

Instructions step by step: set up in WordPress E-learning platform with WP courseware

E-learning on WordPress made easy

I often work with people who are just getting ready to pursue their dreams. Whether it's starting a company, just starting to take a hobby more seriously, dreaming about being on their own again, or being hip deep in a new tech start-up, I'm game to help if people want the advice and are willing to do the work. For the last few years I've been developing course material for a program I call "leveraging trust" and it's all about finding the center of who you are, and your experience so that you can develop products and services from the position of a trusted advisor.

My target

Recently, I've started thinking about putting this program online at a cheaper rate, so that some people could't thru the program on their own before meeting with me walk. And this is, in short, what e-learning course would be. A simple way for people to:

  1. Sign up
  2. Pay a fee
  3. Get access to the first modules
  4. Watch videos and download handouts
  5. Mark that step as complete
  6. Get access to the next module
  7. Rinse and repeat

This should be easy…

Years ago, seriously in 1995, I built one of the first online educational system at Berkeley Lab (and even demonstrated it to a group of guys that would later build Blackboard). So I've watched as learning management system (LMS) have risen and declined on the promises of ease: ease of use and ease of development. From my perspective, nothing is easier than doing e-learning on WordPress. So I thought I'd give it a go and build this version of leveraging trust (coming soon!) in WordPress as online course.

While for using BuddyPress, and a plugin for BuddyPress, it seemed like a lot there are options of configuration and I feared that meant a lot of upkeep. So I went a different route.

So here are my 20 steps.

Step one: Get a good & free membership plugin

I've written about memberships a bit before, and so many great people write so much about them that I don't really focus there. But here's the main thing you should know. Other than Justin Tadlock's version, most others are overly complex – even when (and maybe especially when) they're free. But to satisfy the curious, let me make sure you know the ones I own and have tried:

So we're clear: I bought each of these (that had cost) and tested them all out. Just for you. OK, back to the message…

And the last one and maybe only one you need:

 Step two: Create a membership level

You can see that with only 5 tabs, this must be the easiest membership plugin known to mankind. Most of them have 10-15 tabs, which can be daunting. And what's nice here is that you can create a membership level that acts like a course. So each level can function as a course you are selling. Some plugins do not work this way. About those other post this isn't plugins, but let me just say, paid membership Pro works exactly as I hoped it would – letting me charge people to get access to my content. You see here that you can fill in some quick basics and then put down a price (note: this price is a sample – at 10% the normal cost of the program). So it lets you mark it as a subscription course if you like, and determine if it membership will expire.

Step three: Hit save

Did you like that? Sure, I could have said you had to create pages that would support your membership program, but that takes a lot of space and paid memberships Pro does it for you. I like this approach, so I just went to the bottom of the page and clicked "save".

Step four: Configure payments

I know we're only four steps in but have you noticed how each step is taking literally seconds? That's why I'm positive that you can create this entire course in less than 20 minutes if you have your content ready.

Step five: Configure email

I'm not sure you even need a lot of words other than – fill in your name and email. I bet you can do it in 20 seconds!

Step six: Configure messages

Whenever someone doesn't have access to the course, you're going to want to tell them something. Here's your chance. Edit the message if you like. For me, it what is almost perfect. No. time wasted at all. I did, however, decide to make sure that a non-member could not see anything, not even to excerpt. That's one of the drop downs below.

Step seven: Configure discount codes

If you think you're going to see my discount codes so you can get this program cheaper, you have another thing coming! For you, sure I'll get you a code. Just sign up on the right, so you are getting my notices sent to your inbox and you'll see when I do specials. Plus, I like you. I really really like you.

Notice that I did not mark anything or hit save. Alas, that is a fake code. But what I like is that paid memberships Pro auto-creates ones for you. Nice.

Step eight: Buy WP courseware

By now you've noticed that you've created to entire membership site on your site without spending a penny. So now it's you time to make pay up. But here's the thing, this plugin – WP courseware – from fly plugins, is priced at $67 for a single site. That's a deal for what you're going to see.

Once you buy it, upload it to your site (plugins > add new) and activate it. That simple.

Step nine: Create a course

We're finally getting to the good stuff. But guess what? This is as easy as the other steps you've already taken.

You'll need a name for your course and a description. Now, I like the "only completed/next units visible" because it means sequential delivery (of sorts). But you can pick either approach. So, I mark "automatic" for all users to get access, since I do not need this plugin to do access for me. Paid memberships Pro will do that when we give the right users access to the right launch page.

Step ten: Courses have modules

If you were to break up your course into steps, phases or parts, this is what a module is. It's a name and it has a course it belongs to. It's so the container for your teaching units. Since leveraging trust has 9 parts, I started creating some of them.

Step eleven: Add your content

This is literally what you've been waiting for. Now is when you create a unit – don 't worry that you don' t see any way to connect it to your modules or courses. Just create your unit like you'd write a post.

I want to take a second to talk about how I use video in this program. I know YouTube does some great stuff. But to date, I've not been able to ensure that only certain people have access to my videos. Namely, I don't want non-students to get my content because this represents years of work and I don't want to give it away. So I use Vimeo. And what I love about Vimeo is that with a pro account, I can determine which URLs (domains) my videos can be played from (or embedded). Since chrislema.com is on the list, if you were in this course you could watch it. But you can't find it on Vimeo directly or via search. You can't get it from my site. You can't watch it any other way, than in this course, which is protected by paid memberships Pro.

Create all the units you want (or need).

Step twelve: Connect units to modules & courses

Now you'll want to go back to the list of courses. When you do, you'll see a button that offers you to edit units and modules. It's a drag & drop screen that lets you maneuver the modules into any order you like, as well as assign units to the modules (by again, went drag & dropping them into the green container).

Are you timing yourself. By my watch, we're only 15 minutes into this (the longest being the time it took to go buy that plugin).

Step thirteen: Create your course launch page

This is the point in the 20 steps where you'll connect paid memberships Pro with WP courseware. It's really simple. You start by creating a page, just like any other time. Only on this page, you're going to want to drop a SmugMug that automatically places your course curriculum on it. This page's url is the one that you'd send out in the confirmation email from PMP for this membership level. It's a page that you'll also protect (look on the right and check box the page needs to be so that WordPress knows this protected). Seriously, e-learning on WordPress has never been this easy before.

Step fourteen: Confirm that the course launch page is working

Smart people check their work. You're smart. Can what I say? But you likely haven 't added yourself to this membership group that you created, so here's what you' ll see.

Step fifteen: Add yourself to this membership level

Don't you love testing. Now you know it's working. So go to your user, and in the user details, you can add your eleven to this membership level. Then go back to that page. Here's what you should see.

Notice how only the first unit has a link. The rest aren't linked up yet because of that setting that I marked to sequentially release the units. But you could change your setting if you want.

Additionally WP courseware comes with a widget that lets you put course progress in the sidebar if you want.

Step sixteen: Test purchasing

So out and go log back to the url. You'll see that earlier screen from step fourteen. Click on the registration, and you'll see the list of memberships (or course) that you can buy. Click on the "I want…" link for the next step.

Step seventeen: Create a members

Now that you've clicked on "I want…" you'll get to the registration screen. You'll be creating a new user, as well as giving them the membership role needed to get access to the course.

Step eighteen: Pay

I love how you're flying thru these steps. It takes me longer to write them and you to read them, than for you to do them. But let's do this… (on your own site)… Fill in your payment details and sign up. If you're using stripe, it doesn't take you off the page. I already wrote why I started using stripe, so if you're not using stripe, go get yourself to account.

Step nineteen: Enjoy unit one

If you've done everything right, you should be able to see the confirmation link that takes you to the launch page that lets you see unit one that has a link that lets you in to see the special video content that can only be Lakes on this page. Say that fast without breathing. It makes you giddy. As it should!

Step twenty: Monitor progress

Assuming that you've finished your own unit one, and marked it complete, there's one more cool thing to check out. That's when you go to your user screen. Now you'll see all the students and journey exactly where they are in the course.

Conclusion

Check your watch. Did it take you more than 20 minutes? If it did, try the steps again, now that you're a bit more comfortable. I you bet can do it in less than 20 minutes. It did over here. But my point wasn't just about time. It what to show you that e-learning on WordPress did not have to be complicated with a bunch of coding effort.

Could you do more? Absolutely. Both gravity forms and formidable Pro let you create quizzes – though gravity forms hasnt released theirs yet and FormidablePro doesn't do as much as gravity forms. But WP courseware is looking at adding even more to it's plugin. So it's in the area to keep watching.

30 May

Tables with plug in the

Ultimate tables

Ultimate tables is a free WordPress plugin that allows you to insert tables into posts, pages, and other custom post types.

Six different styles are available with the plugin. Alternatively, you can define your own class or apply no styling to the table. Tables are configured in the settings area. From here you can define rows and columns, and enter text or HTML into cells. Rows and columns can be reordered by defining their row or column number at the side of the table.

Ultimate tables configuration

The output of ultimate tables looks great. Additional rows of data can be broken up into pages.

Ultimate tables example

Once you have completed your table, you can insert it into your Web site of using a short code. The table can thus be placed in a widget.

Overall, I what impressed with what ultimate tables, but I do feel there are better alternatives available if you want more customization options.

TablePress

Formerly known as WP-table reloaded, the free plugin TablePress is one of the best table solutions available to WordPress users.

The plugin is very easy to use. In the settings area, you define the table name, description, number of rows and number of columns. It supports any type of data in cells (even formulas).

Add new table to TablePress

Rows and columns can be moved, inserted, and duplicated. Cells can therefore be selected and combined into larger cells. One of the great features of the plugin is the ability to select a cell and then add content using advanced editor. This allows you to style content and insert images.

Table headers and footers can be added too. There is so on option for alternating row colors and enabling row hover highlighting.

A new table in TablePress

TablePress features search and sorting functionality and table rows can be divided into pages. Custom CSS can be added via the plugin options page and then called in the settings area for individual tables. However, you will not be disappointed with the default design.

TablePress example

TablePress is one of the best table solutions available to WordPress users. With the ability to import and export data using CSV, HTML and JSON, it is a practical option for professionals. Recommended.

Easy table

Easy table works in a different way to other table plugins. It lets you add content using the CSV format in posts and pages. Therefore, rather than entering your content into cells, you separate columns by commas and add new rows by placing content on a new line.

The CSV format doesn't sound like the most user friendly way to add content onto your site, but once you understand how to do it, you want to be able to insert tables much quicker than alternative table plugins.

Easy table General options

You will be pleased to know that easy table walks you through how you can get the most from the plugin. The right hand column of the settings area explains all of the parameters that are on offer. Underneath there are examples of how these parameter can be used to create a table and a test area that lets you practice creating tables.

The options area lets you define the default styling options for tables. There are three styles available, however if you prefer, you can use your own CSS class. Styling settings can be overridden on a table by table basis.

Easy table example

Once you understand how to add tables in easy table, you will appreciate how efficient the plugin really is. I recommend checking it find out if you adding tables through the settings area too time consuming.

Web Simon tables

Web Simon tables table is a free WordPress plugin that lets you create HTML tables easily through the admin area.

A new table can be created by defining the table name, number of rows and number of columns. Alternatively, you can upload a table in CSV format.

Web Simon tables settings

The plugin features a lot of great styling options. There are ten default skins to choose from in the settings area. Alternatively, you can create your own custom skin.

The plugin lets you change column widths, padding, and margins. Additional styling such as CSS3 shadow effects, borders, and footers, so can be enabled.

Web Simon tables example

Web Simon tables is a simple yet functional table plugin that has everything you need to add tables quickly to your website.

FooTable

FooTable is a free WordPress table plugin. It does not help you add new HTML tables. What the plugin can do is enhance your existing HTML tables.

It will make your existing HTML tables mobile friendly by reducing the number of columns displayed and allowing mobile visitors to expand the smaller table to see hidden columns. It wants to so add sorting, filtering, and swedberg. Three styles are included with the plugin and there is option to add your own custom CSS.

FooTable settings

FooTable really transforms HTML tables and gives them a more professional look and feel. The demo area allows you to see how your tables will look in desktops, tablets, and mobile phones.

Example of FooTable

The plugin allows you to define the number of pixels before tables are shown in tablet mode or phone mode (known as the breaking point). This is useful if you find that tables are switching to a too-early reduced layout.

One most of the interesting things of the plugin is that it has native support for TablePress. This allows you to add tables using TablePress and then make them responsive by adding FooTable.

League table

League table table is a premium plugin that is available from CodeCanyon for $12. It what designed to create league tables, standings, ladders and leaderboards. Although it is marketed as a league table generator, the plugin could be used to create any type of table.

League Table Setup

I love the design of the tables that league table creates. The design is clean and data can be sorted by any column. The tables are optimized for desktops, tablets, and mobile phones.

League table example

Like most plugins, League table table uses shortcodes to insert tables into posts, pages, custom post types, and widgets. Worth checking out.

wpDataTables

Retailing at $25, wpDataTables is the most expensive table plugin in this article; However, it is arguably the most versatile.

The plugin lets you create and manage tables through the WordPress admin area. Data can be manually entered or inserted using CSV, Excel, MySQL query, XML, or JSON. Utilizing a MySQL query will allow you to display tables that are over several thousand rows long. There are not many table plugins that can make this claim.

wpDataTables settings

Fonts and colors can be modified via the settings area. You can therefore enable filtering, sorting, and table tools. There's option to display a chart from table data too. If you wish, you can therefore allow front end users to modify tables.

In my opinion, the tables wpDataTables genes Council look amazing. They have been optimized for tablets and smartphones so will look great on any device.

wpDataTables example

The above screen shot does not do justice wpDataTables, so I recommend checking out the official website of wpDataTables to see the plugin in action.

I hope you have enjoyed this look at WordPress plugins table. If you know of any other good WordPress plugins that help you create HTML plugins, please share them below in the comment area :)